How to Reattach a Delta Kitchen Faucet Sprayer Thumb Control Easily
If your Delta kitchen faucet sprayer thumb control has come loose or detached, you’re not alone. This is a common issue in busy kitchens, especially with faucets that get daily use. The good news? You don’t have to be a plumber to fix it.
With some simple tools and clear guidance, you can restore your faucet sprayer and enjoy smooth operation again. This guide is for homeowners, renters, and DIYers who want a step-by-step solution that doesn’t feel overwhelming. I’ll walk you through the process, explain why this happens, and share helpful tips that save time and prevent future problems.
Understanding The Delta Kitchen Faucet Sprayer Thumb Control
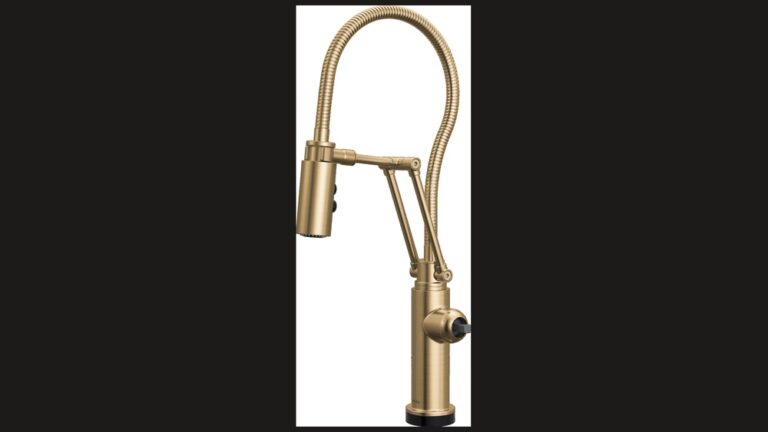
Before you start, it’s important to know what the Delta sprayer thumb control is and how it works. The thumb control is the small lever or button on the sprayer head that lets you switch between regular flow and spray. Over time, repeated use or a hard yank can cause it to pop out, loosen, or even break. Sometimes, the whole sprayer head detaches from the hose, or the control becomes stuck.
Delta kitchen faucets are popular for their durability, but even the best models need maintenance. Knowing how the thumb control connects to the sprayer, and how the sprayer attaches to the hose, will make your repair easier and less stressful.
Why Sprayer Thumb Controls Detach
There are a few main reasons for a detached sprayer thumb control:
- Wear and tear: Continuous use weakens the internal clips or screws.
- Mineral buildup: Hard water can clog or corrode the mechanism.
- Accidental force: Pulling too hard on the hose or twisting the sprayer can dislodge the control.
- Improper installation: If the sprayer was not fitted correctly, it might come off sooner.
Understanding the cause helps you prevent the problem from happening again.

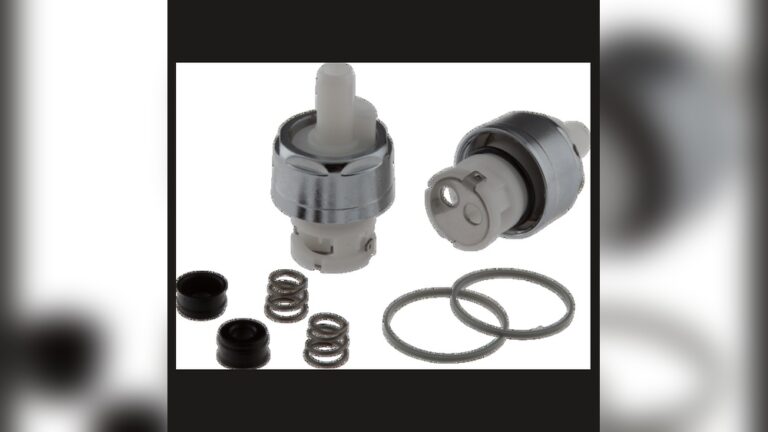
Credit: www.amazon.com
Tools And Materials You’ll Need
Gathering the right tools before you begin will make the process much smoother. Here’s what you’ll need for most Delta kitchen faucet sprayer repairs:
- Adjustable wrench
- Philips and flathead screwdriver
- Needle-nose pliers
- Plumber’s tape (Teflon tape)
- Small bowl or tray (to hold screws and tiny parts)
- Soft cloth or sponge
- Vinegar (for cleaning mineral buildup)
- Replacement parts (if needed, such as O-rings or a new sprayer head)
Pro Tip: Always check your specific Delta faucet model number. You can find this on the manufacturer’s website or in your user manual. This ensures you get the right replacement parts if anything is broken.
Safety Precautions Before You Begin
It’s tempting to dive right in, but a few minutes of preparation can save hours of frustration:
- Turn off the water supply: Look under your sink for the hot and cold water valves. Turn them clockwise to shut off the water.
- Open the faucet: Release any remaining water pressure by turning on the faucet until the flow stops.
- Cover the drain: Use a sink plug or a rag. This keeps small parts from falling down the drain.
Insider Insight: Many people skip the drain cover and end up losing tiny screws or clips. Don’t make this mistake—it’s a common beginner error.
Step-by-step Guide To Reattaching The Sprayer Thumb Control
Let’s walk through the full process to reattach your Delta kitchen faucet sprayer thumb control. These instructions cover the most common Delta models, but your faucet may have slight differences.
1. Inspect The Sprayer And Thumb Control
Carefully examine the sprayer head and the thumb control. Check for:
- Cracks or physical damage
- Missing screws or clips
- Mineral deposits around the control button
If you see heavy buildup, soak the sprayer in vinegar for 30 minutes. This loosens hard water deposits that can block movement.
2. Remove The Sprayer Head (if Needed)
If the sprayer is still attached but the thumb control is loose, you may need to remove the entire sprayer head for better access.
- Hold the base of the sprayer head.
- Twist counterclockwise to unscrew it from the hose.
- If it’s stuck, use a soft cloth and pliers for grip (be gentle to avoid scratches).
Place any washers or O-rings in your bowl so they don’t get lost.
3. Identify The Attachment Mechanism
Delta faucets use different connection types for their sprayers:
- Snap-on clips: Common in newer models. The sprayer clicks onto the hose with a plastic or metal clip.
- Threaded connections: The sprayer screws onto the hose, usually sealed with an O-ring.
- Quick-connect couplings: Found in some pull-down sprayers. These use a push-and-click system.
Check your sprayer and hose ends to see which type you have.
4. Clean All Contact Surfaces
Use a sponge or cloth to wipe away any dirt, debris, or old plumber’s tape. If you see white or green crust, it’s likely mineral buildup—scrub gently with vinegar.
Hidden Tip: Cleaning is often the forgotten step that makes reattachment fail. Even a tiny bit of grit can stop the thumb control from working smoothly.
5. Reattach The Thumb Control
If the thumb control button or lever has popped out but is not broken:
- Align the button with the slot in the sprayer head.
- Press firmly until you hear or feel a click.
- For models with a retaining screw, use a screwdriver to secure it.
If the control is damaged, you’ll need a replacement part. Some Delta sprayer heads let you buy just the control; others require replacing the whole head.
6. Reinstall The Sprayer Head
Once the thumb control is in place:
- For snap-on types: Line up the clip and push the sprayer head onto the hose until it clicks.
- For threaded types: Wrap the hose threads with plumber’s tape, then screw the sprayer head on clockwise. Hand-tighten, then use pliers for a gentle final twist.
- For quick-connect: Push the hose end into the sprayer until you hear a click.
Extra Insight: If you feel resistance or the sprayer feels wobbly, stop and check alignment. Forcing it can crack the plastic or strip the threads.
7. Test For Leaks And Proper Function
Turn the water supply back on. Hold the sprayer over the sink and press the thumb control:
- Check for leaks around the connection point.
- Test both spray and stream modes.
- If you see drips, turn off the water, remove the sprayer, and reseat the O-ring or add more plumber’s tape.
Common Mistake: Forgetting to check for leaks before finishing. Water damage under the sink can be costly!
When To Replace Parts Instead Of Reattaching
Sometimes, reattaching isn’t enough. Here’s when you should consider replacement:
- The thumb control is cracked or broken.
- The sprayer head leaks even after reseating.
- The connection clip is missing or damaged.
- The hose is frayed or split.
Replacement sprayer heads are available at most hardware stores or online. Bring your old sprayer or your faucet model number to match the right part.
Delta Sprayer Types Compared
Not all Delta kitchen faucets use the same sprayer design. Here’s a helpful comparison to understand your options:
| Sprayer Type | Attachment Method | Common Issues | Repair Difficulty |
|---|---|---|---|
| Classic Side Sprayer | Threaded | Leaks, loose thumb control | Easy |
| Pull-Down Sprayer | Quick-connect | Button jams, hose detaches | Moderate |
| Pull-Out Sprayer | Snap-on clip | Clip breaks, leaks | Easy-Moderate |
Key Point: Knowing your sprayer type helps you get the right parts and follow the right steps. Double-check before you buy or start repairs.
Preventing Future Detachment
Once you’ve reattached the thumb control, you want the fix to last. Here’s how to keep your Delta sprayer working smoothly:
- Pull gently, not hard: Avoid yanking the hose, which stresses the connections.
- Clean regularly: Wipe the sprayer head and button with a soft cloth.
- Descale every few months: Soak the sprayer in vinegar to dissolve mineral buildup.
- Inspect for wear: Every 6 months, check the hose and sprayer for cracks or leaks.
Less-Known Tip: Some Delta faucets have a small set screw at the base of the sprayer head. Tightening this with a small Allen wrench can prevent loosening.
Troubleshooting: What If It Still Doesn’t Work?
If you followed all the steps and your Delta kitchen faucet sprayer thumb control still won’t stay attached or work:
- Double-check that all parts are present and not cracked.
- Make sure the hose isn’t twisted or kinked under the sink.
- Look for hidden debris inside the sprayer head.
- Test the faucet with the sprayer removed—if water flows, the problem is in the head, not the hose.
If you’re stuck, Delta’s customer support can help. They offer helpful diagrams and sometimes send free replacement parts if your faucet is under warranty. Visit their official page at Delta Faucet Service & Parts for more details.
Step-by-step Example: Reattaching A Pull-down Sprayer Thumb Control
Let’s look at a real example. Sarah, a busy mom, noticed her Delta pull-down sprayer’s thumb control popped out while doing dishes. Here’s how she fixed it:
- She turned off the water and covered the drain.
- She unscrewed the sprayer head from the hose.
- She found mineral buildup inside, so she soaked it in vinegar.
- After cleaning, she aligned the thumb control button with the slot and pressed until it clicked.
- She wrapped the hose threads with plumber’s tape and reattached the head.
- After turning on the water, she tested the spray and stream. Everything worked!
Sarah’s mistake: She almost forgot to check the O-ring, which could have caused a leak. Always inspect all seals before reassembling.
Common Mistakes To Avoid
Many people make simple errors when trying to reattach a Delta kitchen faucet sprayer thumb control. Avoid these pitfalls:
- Skipping the cleaning step—buildup prevents proper seating.
- Losing small parts down the drain.
- Over-tightening, which cracks plastic or damages threads.
- Using the wrong replacement part for your faucet model.
- Forgetting to check for leaks before finishing.
Quick Comparison: DIY vs. Hiring a Plumber
Should you fix it yourself or call a pro? Here’s how they compare:
| Factor | DIY | Professional |
|---|---|---|
| Cost | Low (parts only) | High ($75–$200+ per visit) |
| Time | 30–60 minutes | 1–2 hours (including wait time) |
| Control | You do the work | Handled by expert |
| Warranty | May void if done incorrectly | Usually protected |
Most minor repairs are DIY-friendly if you take your time and follow the steps.
How To Find The Right Replacement Parts
Finding the right part is key if your Delta thumb control or sprayer head is broken.
- Check your model number: Usually found under the sink or in your manual.
- Visit Delta’s website: Use their parts finder tool.
- Bring the old part: To the hardware store for a perfect match.
- Compare connectors: Make sure hose and sprayer ends fit together.
Non-Obvious Insight: Some generic sprayer heads fit Delta hoses, but original Delta parts last longer and are less likely to leak.

Credit: www.amazon.com
Caring For Your Delta Kitchen Faucet Sprayer
Maintenance is easier than repairs. Here’s how to keep your sprayer in top shape:
- Wipe the sprayer head weekly to remove food and soap residue.
- Soak the head in vinegar every few months to prevent scale.
- Check the thumb control movement—is it smooth or sticky?
- If you see drips, address them immediately to prevent bigger problems.
Regular care adds years to your faucet’s life and keeps it working like new.
Statistics: How Common Are Sprayer Problems?
You’re not alone with sprayer troubles. According to a 2022 survey by the National Association of Home Builders:
- 38% of homeowners reported kitchen faucet sprayer issues in the last 3 years.
- Of these, 60% were related to loose or detached controls.
- 85% of repairs were completed successfully by homeowners without hiring a plumber.
These numbers show that with the right guidance, most people can solve this problem themselves.
When To Call A Professional
While most sprayer repairs are DIY-friendly, call a plumber if:
- You see water leaking under the sink or behind the faucet.
- The hose or sprayer is badly damaged.
- You can’t remove the sprayer head even with tools.
- The problem returns soon after your repair.
A pro can prevent water damage and make sure the repair lasts.
Frequently Asked Questions
What If My Delta Thumb Control Is Stuck And Won’t Move?
If your thumb control is stuck, mineral buildup is likely the cause. Soak the sprayer head in vinegar for 30 minutes, then gently press the control. If it’s still stiff, check for debris inside. If the button is damaged, you may need to replace the sprayer head.
Can I Use A Universal Sprayer Head Instead Of Delta’s?
Some universal sprayer heads fit Delta hoses, but not all. Check the thread size and attachment type. Using an official Delta part is safer for long-term use and reduces the risk of leaks or poor fit.
How Do I Find My Delta Faucet Model Number?
Look under your sink on the supply line tag or check your faucet’s original box or manual. The model number helps you find the right parts and instructions. If you’re unsure, Delta’s website has a model finder tool.
Is It Normal For The Sprayer Hose To Drip After Reattachment?
A small drip right after reattaching can be normal as water flows back into the hose. But if it continues, check that the O-ring is seated correctly and the connection is tight. Persistent leaks mean something isn’t sealed properly.

Credit: www.deltafaucet.com
Where Can I Get Official Delta Replacement Parts?
You can buy official Delta parts at hardware stores, plumbing supply shops, or online at the Delta Faucet Service & Parts page. Always match your part to your faucet’s model number for the best fit.
Getting your Delta kitchen faucet sprayer thumb control reattached is a satisfying and manageable task for most homeowners. With a little patience, the right tools, and the tips in this guide, your faucet will be back to working like new—no plumber required.