How to Fix Bathtub Faucet: Easy Steps for a Leak-Free Bath
A bathtub faucet that drips, leaks, or doesn’t give enough water can be more than a small annoyance. Over time, even a tiny leak can waste hundreds of gallons of water and increase your bills. A faulty faucet can also make daily routines less comfortable and may even cause damage to the bathroom if left untreated.
Fixing a bathtub faucet yourself might sound difficult, but with the right guidance, most homeowners can handle it. You don’t need to be a plumbing expert; you just need patience, the right tools, and a clear step-by-step plan. This guide will help you understand the process, avoid common mistakes, and finish the job with confidence.
Understanding Your Bathtub Faucet
Before you start, it’s important to know the type of faucet you have. Not all bathtub faucets are the same. The repair steps will change depending on the design and the problem.
Types Of Bathtub Faucets
- Single-handle faucet: Has one lever that controls both hot and cold water.
- Double-handle faucet: Two separate handles for hot and cold water.
- Three-handle faucet: Separate handles for hot, cold, and the shower diverter.
- Tub spout with diverter: The diverter is built into the spout, allowing you to switch between tub and shower.
Knowing your faucet’s type helps you buy the right replacement parts and understand which steps apply to your repair.
Common Bathtub Faucet Problems
The most frequent issues are:
- Dripping faucet (even when fully turned off)
- Leaking around the handles
- Low water pressure
- Difficulty turning handles
- Water not switching from tub to shower
While the reasons can vary, most problems come from worn washers, faulty cartridges, or mineral buildup.
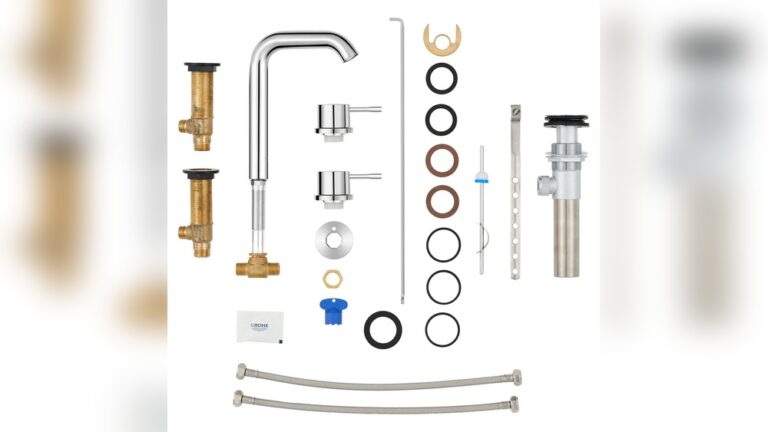
Tools And Materials You’ll Need
Being well-prepared saves time and reduces stress. Here’s what you should have before starting:
- Adjustable wrench
- Phillips and flathead screwdrivers
- Allen wrench set (for some handles)
- Plumber’s tape (Teflon tape)
- Replacement washers, O-rings, or cartridge (specific to your faucet)
- Utility knife
- Penetrating oil (like WD-40)
- Old toothbrush or small brush
- Bucket or bowl
- Rags or towels
- Flashlight
For some repairs, you may need needle-nose pliers or a faucet puller.
Credit: www.homedepot.com
How To Fix A Dripping Bathtub Faucet
A dripping faucet is usually caused by a worn washer or faulty cartridge. The following steps will help you fix most single or double-handle bathtub faucets.
Step 1: Turn Off The Water Supply
Locate the main water shut-off valve in your home. Turn it off to prevent water from spraying when you remove faucet parts. Open the faucet to drain any remaining water.
Step 2: Plug The Drain
Use a rubber stopper or a rag to block the drain. This prevents screws or small parts from falling in.
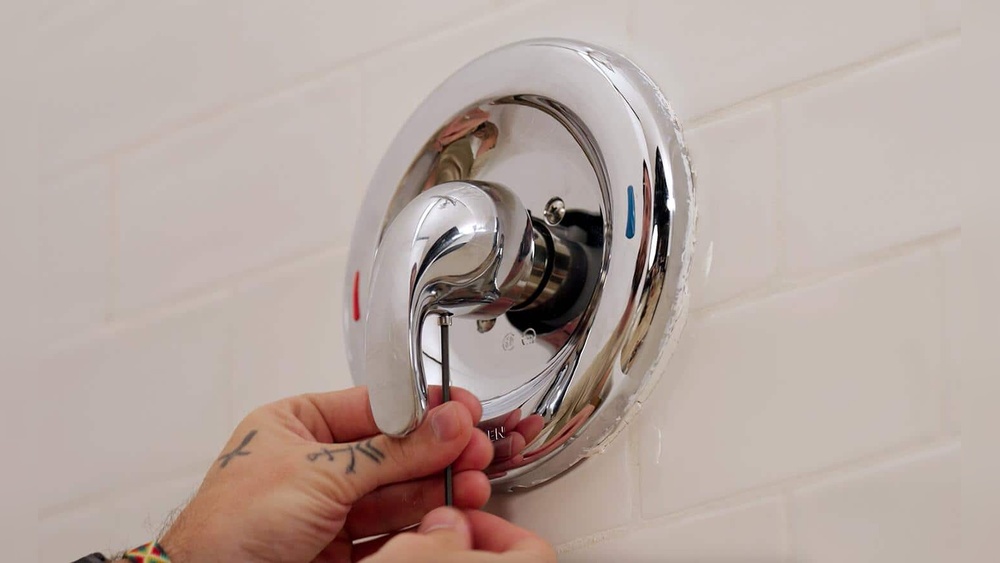
Step 3: Remove The Faucet Handle
Look for a small screw under or behind the handle. This screw might be hidden under a decorative cap. Pry off the cap with a flathead screwdriver. Use the correct screwdriver or Allen wrench to remove the screw.
Gently pull off the handle. If it’s stuck, apply a little penetrating oil and wait a few minutes before trying again.
Step 4: Take Off The Escutcheon Plate
The escutcheon is the decorative plate behind the handle. Remove any screws, then carefully pull the plate away. You might need to cut through old caulk with a utility knife.
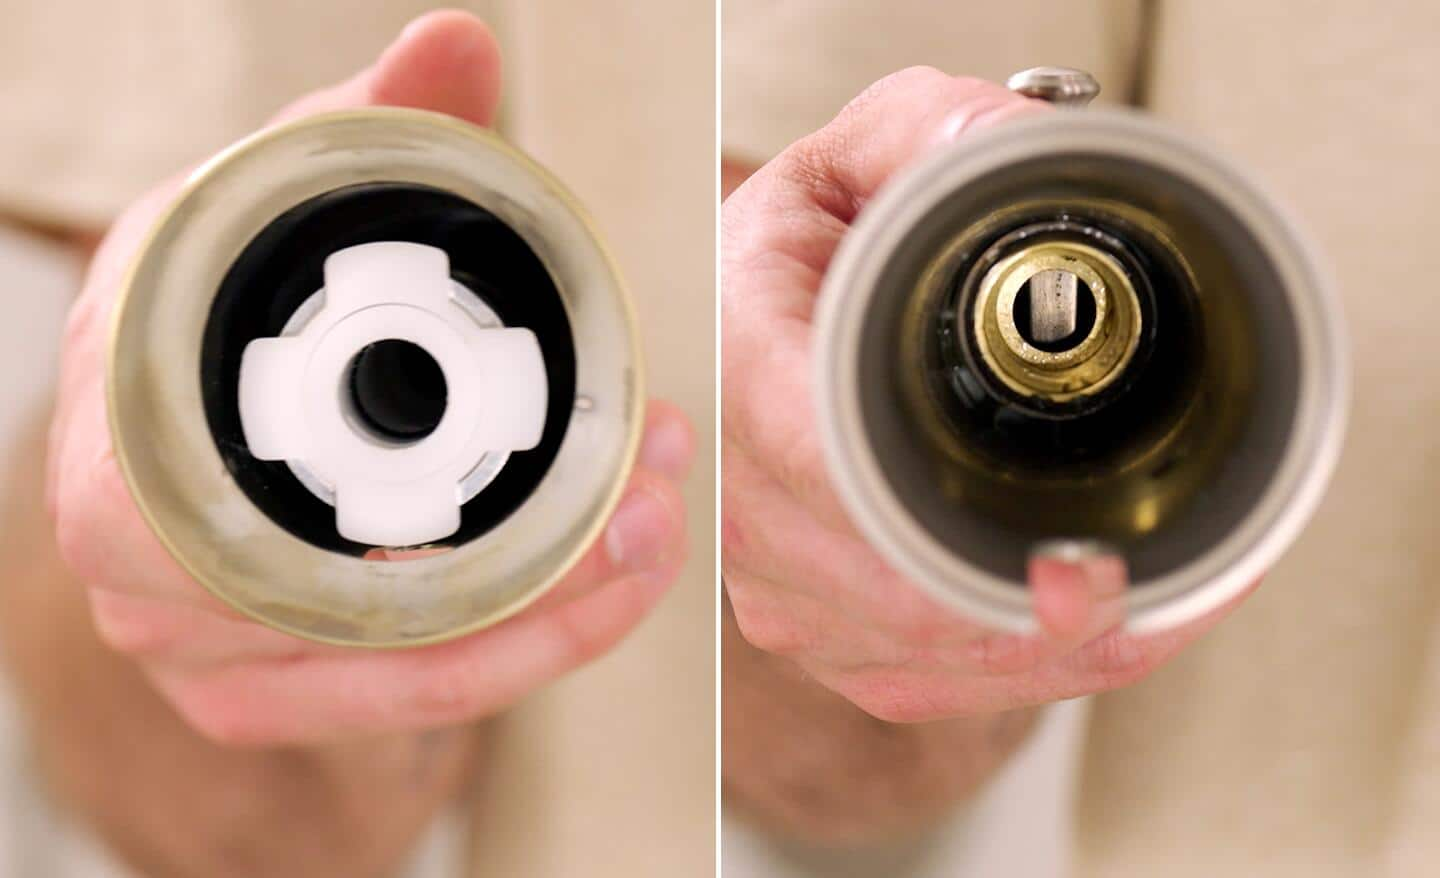
Step 5: Remove The Stem Or Cartridge
With the handle and plate removed, you’ll see the faucet stem (for compression-type faucets) or cartridge (for cartridge-type faucets).
- For stems: Use an adjustable wrench to unscrew and pull out the stem.
- For cartridges: Use pliers to pull the cartridge straight out. Some models may need a cartridge puller.
Take a photo at each step to help with reassembly.
Step 6: Inspect And Replace Parts
Check the washer at the end of the stem. If it’s worn, cracked, or hard, replace it. Inspect O-rings for damage and replace if necessary. For cartridge faucets, replace the whole cartridge with a matching part.
You can buy most washers, O-rings, and cartridges at hardware stores. Bring the old part with you for an exact match.
Step 7: Clean And Reassemble
Before putting everything back, clean the faucet body and parts with a brush. Remove any mineral buildup.
Wrap plumber’s tape on threaded parts to prevent leaks. Reassemble in reverse order: insert the stem or cartridge, replace the escutcheon, attach the handle, and tighten all screws.
Step 8: Test The Faucet
Remove the drain plug. Turn the water supply back on slowly. Open the faucet and check for leaks. If it drips, double-check that the washer or cartridge is installed correctly and all parts are tight.
Fixing A Leaking Tub Spout
Sometimes, water leaks from the tub spout even when the faucet is off. This can mean the diverter (switch that sends water to the shower) is faulty or the spout is damaged.
Step 1: Identify The Spout Type
There are two main types:
- Screw-on spout: Has threads and screws onto the pipe.
- Slip-on spout: Secured with a set screw underneath.
Step 2: Remove The Spout
- For screw-on: Turn the spout counterclockwise by hand or with a wrench (wrap a rag around the spout to avoid scratches).
- For slip-on: Loosen the set screw with an Allen wrench, then pull the spout off.
Step 3: Inspect And Replace
Check for cracks, corrosion, or a faulty diverter. If damaged, replace the spout with a matching model.
Step 4: Reinstall
For both types, apply plumber’s tape to the pipe threads before installing the new spout. Tighten the spout by hand and secure any screws.
Step 5: Test For Leaks
Turn on the water and switch between tub and shower. If water still leaks, the issue may be inside the faucet valve.
:max_bytes(150000):strip_icc()/how-to-replace-a-bathtub-faucet-5210836-10-6825223c1e75442187d5ab09690510d4.jpg)
Credit: www.thespruce.com
Solving Low Water Pressure
Low pressure in the bathtub can make showering uncomfortable. The cause is often mineral buildup inside the faucet or aerator.
Step 1: Check Other Faucets
If only the bathtub has low pressure, the problem is local. If all faucets are affected, check your home’s water supply.
Step 2: Clean The Aerator Or Cartridge
Many tub faucets do not have an aerator, but some do. Unscrew the tip of the spout and clean out any debris.
For cartridge faucets, remove and soak the cartridge in vinegar to remove calcium deposits. Rinse and reinstall.
Step 3: Flush The Lines
With the cartridge or stem removed, briefly turn on the water supply to flush out dirt. Have a bucket ready to catch the water.
Step 4: Reassemble And Test
Put the faucet back together. Test water pressure. If still low, the supply pipes may be clogged, which could require a plumber.
Fixing Hard-to-turn Handles
Handles that are stiff or squeaky can usually be fixed with cleaning and lubrication.
Step 1: Remove Handle And Stem
Follow the same steps as above to remove the handle and stem.
Step 2: Clean And Lubricate
Use a brush to remove any buildup. Apply plumber’s grease to all moving parts, especially O-rings and the stem.
Step 3: Replace Worn Parts
If O-rings are cracked or the stem is corroded, replace them.
Step 4: Reinstall And Test
Put everything back and try the handle. It should turn smoothly.
Repairing The Shower Diverter
If your tub faucet fails to switch water to the shower, the diverter may be stuck or broken.
Step 1: Find The Diverter Type
- Lift-gate: On top of the tub spout.
- Knob or lever: Between the faucet handles.
- Pull-up: On the end of the spout.
Step 2: Remove And Inspect
Take off the diverter following the earlier steps for handle or spout removal. Check for broken parts or mineral buildup.
Step 3: Replace Or Clean
Replace faulty diverters with a matching part. If it’s just stuck, soak in vinegar and scrub with a brush.
Step 4: Reinstall And Test
Reattach the diverter and test both tub and shower water flow.
When To Replace The Entire Faucet
Sometimes, repairs won’t solve the problem. If your faucet is very old, heavily corroded, or has repeated issues, it may be best to replace the whole fixture.
Signs You Need A Full Replacement
- Constant leaks after repairs
- Cracks in the faucet body
- Handles won’t turn at all
- Water stains or rust
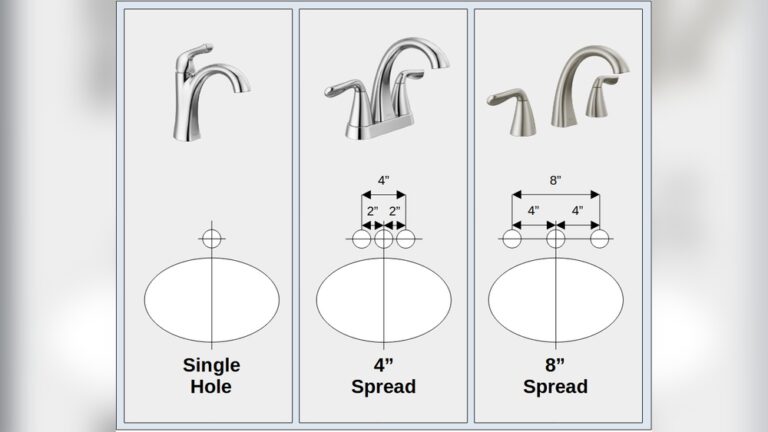
Choosing A New Faucet
Measure the distance between pipe centers and match the number of handles. Choose a trusted brand for durability. Modern faucets often have ceramic cartridges, which last longer and are easier to repair.
Cost And Time
Replacing a bathtub faucet usually takes 1-2 hours for DIYers. Expect to spend $40–$150 for a quality faucet set. If hiring a plumber, labor can cost $100–$300 depending on complexity.

Credit: www.familyhandyman.com
Safety And Preparation Tips
Taking simple precautions can prevent damage and accidents.
- Lay towels around your work area to catch drips and small parts.
- Keep a small container for screws and washers.
- Use a flashlight for dark or hidden spots.
- Work slowly—forcing parts can break pipes or the faucet.
Hot water can cause burns. Always test water temperature after repairs before using the faucet.
How To Avoid Common Mistakes
Many first-timers run into similar problems. Here’s how to avoid them:
- Not turning off the water: This can cause flooding or injury.
- Losing small parts: Always plug the drain and organize screws.
- Using the wrong parts: Bring old cartridges or washers to the store for an exact match.
- Over-tightening: This can crack the faucet or strip threads.
- Skipping cleaning: Mineral deposits left inside will cause new leaks.
One insight many people miss: Most leaks are caused by a simple washer or O-ring. Don’t rush to replace the whole faucet without checking these small, cheap parts first.
Another beginner mistake is using regular grease instead of plumber’s grease. Only plumber’s grease is safe for drinking water and won’t damage rubber seals.
Comparing Bathtub Faucet Types
Choosing the right faucet type during replacement can make future repairs easier. Here’s a quick comparison:
| Faucet Type | Repair Difficulty | Durability | Common Problems |
|---|---|---|---|
| Single-handle | Moderate | High | Cartridge wear |
| Double-handle | Easy | Medium | Washer/O-ring leaks |
| Three-handle | Challenging | Medium | Diverter failure |
| Tub spout diverter | Easy | Medium | Diverter clog or break |
Replacement Parts: What To Look For
Not all faucet parts are equal. Quality matters for a long-lasting repair.
| Part | Material | Lifespan | Cost Range |
|---|---|---|---|
| Washer | Rubber/Silicone | 2-5 years | $0.50–$2 |
| O-ring | Rubber | 3-7 years | $0.50–$2 |
| Cartridge | Brass/Ceramic | 5-15 years | $8–$40 |
| Diverter | Brass/Plastic | 5-10 years | $6–$25 |
Choosing better materials (like ceramic cartridges instead of plastic) can save time and money in the long run.
Real-world Example: Fixing A Dripping Double-handle Faucet
Let’s walk through a typical repair.
Problem: Water drips constantly from the tub spout. It’s a double-handle faucet.
Solution:
- Shut off water supply and open handles to drain.
- Pry off handle caps, remove screws, and pull handles off.
- Unscrew and pull out the hot and cold stems with a wrench.
- Examine the rubber washers—they’re cracked.
- Replace both washers and any worn O-rings.
- Clean faucet interior, wrap threads with plumber’s tape, and reinstall stems and handles.
- Turn on water, test both sides—no more drip!
This repair took about 30 minutes and cost under $5 for new washers.
When To Call A Professional
DIY repairs are great for simple faucet problems. But sometimes, the issue is bigger.
Call a plumber if:
- The leak is inside the wall
- Pipes are corroded or broken
- The faucet is stuck and you risk damaging the plumbing
- You can’t identify the faucet model or part
A professional can fix hidden or complex problems and prevent costly water damage.
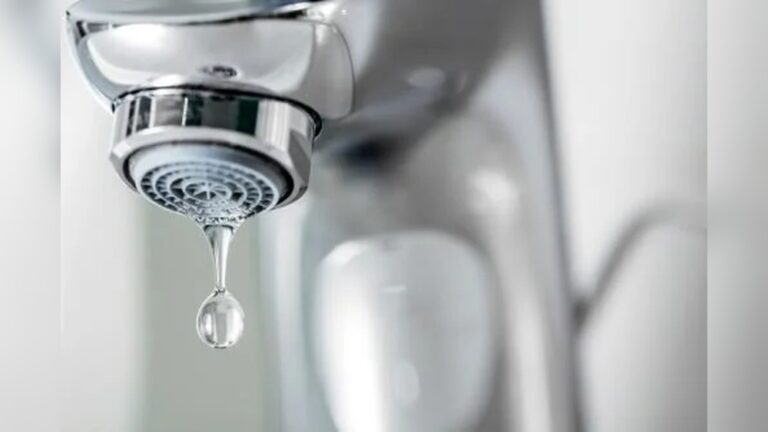
Saving Water And Money By Fixing Leaks
A leaking faucet wastes more than you think. According to the U. S. Environmental Protection Agency, a faucet that drips once per second can waste over 3,000 gallons per year. Fixing leaks quickly saves water, reduces your bill, and helps the environment.
Where To Learn More
If you want to understand faucets and home plumbing better, check out Wikipedia’s Plumbing page for more details and background information.
Frequently Asked Questions
How Do I Know Which Replacement Part To Buy For My Faucet?
The easiest way is to bring the old part (washer, cartridge, or O-ring) to the hardware store. Staff can help you find a match. Many faucet brands also have model numbers stamped on the faucet or in the manual.
Can I Fix A Bathtub Faucet Without Turning Off The Main Water Supply?
No. Always turn off the water supply before starting any faucet repair. This prevents flooding, injuries, and makes the repair safer and less stressful.
Why Does My New Washer Or Cartridge Not Stop The Leak?
A new washer or cartridge may not work if the faucet seat inside the valve is scratched or corroded. In this case, you may need to replace the seat or the entire faucet.
What If The Handle Is Stuck And Won’t Come Off?
Spray a little penetrating oil where the handle meets the faucet. Wait 10–15 minutes, then try again gently. Avoid using too much force to prevent breaking the handle or pipe.
Is It Better To Repair Or Replace An Old Faucet?
If the faucet is more than 15 years old, has repeated leaks, or is heavily rusted, replacement is usually the better choice. New faucets are more efficient and easier to maintain.
Fixing a bathtub faucet is a practical way to improve your bathroom, save resources, and build your DIY skills. With the right steps and careful attention, even a first-timer can get professional results. If you ever feel unsure, it’s always better to ask for help than to risk bigger problems.