How to Repair Bathtub Faucet Leak: Step-by-Step DIY Guide
A leaking bathtub faucet is a common problem in many homes. You may notice water dripping even when the tap is off, or hear a soft, regular sound. Over time, these leaks can waste a surprising amount of water and increase your bills.
Even a small drip can waste up to 3,000 gallons a year if left unfixed. But the good news is, you do not need to call a plumber right away. With a little patience and the right steps, you can repair most bathtub faucet leaks yourself.
This guide will walk you through everything, from identifying the cause to fixing the leak for good.
Why Bathtub Faucets Leak
Understanding why your faucet is leaking helps you fix it correctly. The most common causes include:
- Worn-out washers – This is the main reason for leaks in older faucets. The washer presses against the valve seat, and over time, it can wear out or become misshapen.
- Damaged O-rings – O-rings seal the faucet handle. When they break or wear down, leaks can appear around the handle.
- Corroded valve seats – Water can corrode the metal inside the faucet, causing leaks.
- Loose or broken parts – Screws, nuts, or seals can become loose with use.
- Faulty cartridge – Modern faucets often use a cartridge inside. If this fails, leaks are common.
A non-obvious insight: sometimes, a leak is caused by high water pressure. If the leak happens only when other taps are running, check your home’s water pressure before replacing parts.
Tools And Materials You Will Need
Before you start, gather all the necessary tools and parts. Having everything ready saves frustration.
- Adjustable wrench – For loosening and tightening nuts.
- Screwdrivers – Both Phillips and flat-head types.
- Replacement washers and O-rings – Match these to your faucet model.
- Cartridge or stem – For cartridge-based faucets.
- Plumber’s grease – Helps seals last longer.
- Penetrating oil – For loosening stuck parts.
- Teflon tape – Seals threads and prevents leaks.
- Cloth or rag – To cover the drain and protect parts.
- Bucket – To catch any water.
- Flashlight – Sometimes it’s dark under the faucet.
You may not need every item, but it’s better to be over-prepared.

Credit: www.youtube.com
Types Of Bathtub Faucets And How They Differ
Not all faucets are built the same. There are three main types found in most bathrooms:
| Faucet Type | Main Features | Common Problems |
|---|---|---|
| Compression | Two separate handles (hot/cold) | Worn washer, loose nut |
| Cartridge | Single or double handle, smooth action | Faulty cartridge, O-ring wear |
| Ball-type | Single handle, uses a ball assembly | Ball wear, spring failure |
Knowing your faucet type is important. Compression faucets are more common in older homes, while cartridge and ball-type are found in modern bathrooms.
Step-by-step Guide To Repairing A Leaking Bathtub Faucet
The process below covers most situations. If you are unsure, take a photo of your faucet to match parts at the hardware store.
1. Turn Off The Water Supply
Always start by shutting off the water. There are usually two valves near the bathtub or in the basement. If you cannot find them, turn off the main water supply for your house. Open the faucet to let any water drain out.
Tip: Place a cloth over the drain to avoid losing small parts.
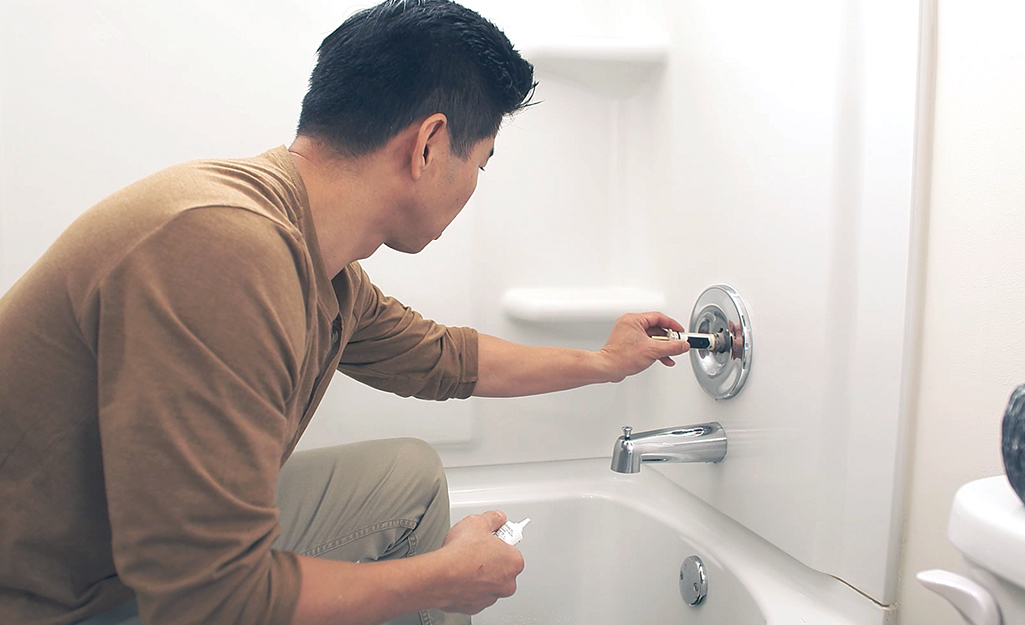
2. Remove The Faucet Handle
Use a flat-head screwdriver to gently pop off the decorative cap on the handle. Underneath, you will find a screw. Unscrew it and pull the handle off. If it’s stuck, use a little penetrating oil and wiggle gently.
Beginner mistake: Forcing the handle can break it. Patience is key.
3. Take Apart The Faucet Assembly
Depending on your faucet type:
- Compression: You will see a packing nut. Use an adjustable wrench to unscrew it. Remove the stem.
- Cartridge: After removing the retaining clip, pull the cartridge out.
- Ball-type: Remove the cap, then the cam, ball, and springs.
Take careful note of the order and position of each piece. You may want to snap a photo with your phone.
4. Inspect All Parts For Damage
Examine the washer, O-rings, and other seals. Look for cracks, flattening, or obvious wear. Also, check for corrosion on the valve seat inside the faucet body.
Non-obvious tip: Even a tiny crack in an O-ring can cause a steady leak. Replace all washers and O-rings, not just the obviously damaged ones.
5. Replace Worn Or Damaged Parts
Take the old parts to the hardware store to get exact matches. Faucet parts are not universal; size and shape matter.
- Washer: Fit the new washer onto the stem.
- O-ring: Coat with plumber’s grease before installing.
- Cartridge: Insert the new cartridge in the same orientation as the old one.
Apply Teflon tape to any threaded connections to help prevent leaks.
6. Reassemble The Faucet
Put all parts back in the reverse order you took them out. Tighten nuts firmly, but do not overtighten. Replace the handle and secure the screw.
7. Turn On The Water Supply And Test
Open the water valves slowly. Check for leaks around the faucet and handle. Run the water and turn it off; ensure no more drips occur.
If the leak remains: Double-check that all parts are seated correctly and that you replaced the right components.
Special Cases: Fixing A Leaking Tub Spout
Sometimes, the leak comes from the spout, especially if you see water trickling down the wall. Here is what you should do:
- Check for diverter issues: If the tub/shower diverter is stuck or worn, replace it.
- Loose spout: Tighten the screw under the spout if present.
- Corroded connection: Remove the spout and check the pipe. Clean off corrosion and use Teflon tape when reinstalling.
When To Call A Professional
If you have followed all the steps and the leak continues, there may be a deeper problem. Hidden pipe damage or severe corrosion sometimes requires a plumber’s skill. Also, if your faucet is very old or you cannot identify the parts, professional help is wise.
A study by the Environmental Protection Agency found that household leaks can waste nearly 1 trillion gallons of water yearly in the US. So, delaying repairs is not just costly – it wastes resources too.
Credit: www.homedepot.com
Comparison: Diy Faucet Repair Vs. Hiring A Plumber
You may wonder if it’s better to repair the leak yourself or hire an expert. Here’s a comparison to help you decide:
| Aspect | DIY Repair | Professional Plumber |
|---|---|---|
| Cost | Low (parts only, $5-$30) | High ($100-$300+ service call) |
| Time | 1–2 hours | Usually less than 1 hour |
| Skill Needed | Basic tools, careful steps | Expertise, quick diagnosis |
| Warranty | None | Often included |
DIY is rewarding and saves money, but professionals bring experience and peace of mind.
How To Prevent Future Faucet Leaks
Fixing a leak is good, but preventing another is even better. Here are some tips:
- Don’t overtighten handles – This strains washers and seals.
- Clean faucet regularly – Hard water minerals can build up and damage parts.
- Replace washers and O-rings every few years – Prevents leaks before they start.
- Monitor water pressure – High pressure increases wear and tear. Use a pressure gauge to check; normal home pressure is 40–60 psi.
- Check for drips often – Early detection means easier repairs.
Real-world Example: Fixing A Cartridge Faucet Leak
Let’s walk through an example for clarity. Suppose you have a single-handle bathtub faucet that drips.
- First, turn off the water and remove the handle.
- Next, pull out the cartridge using pliers. You notice the rubber seal is damaged.
- You buy a matching cartridge and some plumber’s grease.
- Install the new cartridge, reassemble everything, and turn on the water.
- The drip is gone. You saved about $150 in plumber’s fees.
This example shows that with a little effort, most homeowners can fix a common leak.
Common Problems And How To Solve Them
Even with careful work, some problems can appear. Here are solutions for frequent issues:
Handle Won’t Come Off
Spray a little penetrating oil and wait 10–15 minutes. Tap gently with a rubber mallet if needed.
Faucet Still Leaks After Repair
Re-check that you replaced all washers and O-rings. Sometimes a missed part or misaligned piece is the cause.
Leak At The Spout Base
Remove the spout and check for cracks or corrosion. Use Teflon tape when reinstalling.
No Water After Reassembly
Make sure the main water supply is back on and all parts are installed in the correct order.
Hard Water Buildup
Soak removable parts in vinegar overnight to dissolve mineral deposits.
How Much Water Does A Leaking Faucet Waste?
Many people underestimate the impact of a small drip. Here’s a quick look at water loss:
| Drip Rate | Gallons Wasted/Year |
|---|---|
| 1 drip/second | 3,000 |
| 2 drips/second | 6,000 |
| Steady stream | Over 10,000 |
As you can see, even slow leaks add up quickly. Fixing them saves money and helps the environment.
Safety Tips For Diy Faucet Repair
- Turn off the water supply before starting any work.
- Cover the drain to avoid losing small parts.
- Wear gloves if you have sensitive skin or need extra grip.
- Use the correct tools – Improvised tools may damage parts.
- Work slowly – Rushing increases mistakes.
It’s better to double-check each step than to hurry and risk breaking something.
Where To Find Replacement Parts
Most local hardware stores carry a wide range of faucet parts. Bring your old parts or know your faucet’s brand and model. Some brands, like Moen or Delta, have unique designs. If you cannot find parts locally, online stores offer almost every replacement piece.
You can also learn more about faucet types and repair parts at the Family Handyman website.
Environmental And Financial Benefits Of Fixing Leaks
Repairing a leaking bathtub faucet is not only good for your wallet, it’s good for the planet. The EPA notes that fixing household leaks can save a family about 10% on their water bill. On a larger scale, it helps conserve valuable water resources.
Remember: a tiny leak can become a big problem if ignored. Mold, mildew, and even structural damage can result from constant moisture. Quick action saves money and headaches later.

Credit: www.familyhandyman.com
Frequently Asked Questions
How Do I Know Which Type Of Bathtub Faucet I Have?
Look at the handles. Compression faucets have two separate handles for hot and cold. Cartridge and ball-type faucets usually have a single handle. If you’re unsure, remove the handle and check the internal mechanism or bring a photo to your hardware store for help.
Can I Fix A Bathtub Faucet Leak Without Turning Off The Water?
No, you should always turn off the water supply before starting any repairs. This prevents accidental flooding, water damage, and injury.
What If I Can’t Remove A Stuck Screw Or Handle?
Apply penetrating oil and let it soak for 10–15 minutes. Use the correct screwdriver and avoid excessive force. If it remains stuck, ask for help at your local hardware store.
How Often Should I Replace Faucet Washers And O-rings?
Replace them every 3–5 years or at the first sign of a drip. Regular maintenance helps avoid bigger problems.
Is It Better To Repair Or Replace An Old Bathtub Faucet?
If your faucet is very old, corroded, or parts are no longer available, replacement may be best. Modern faucets are more efficient and easier to maintain.
Fixing a bathtub faucet leak is a valuable skill for any homeowner. With careful work and a little time, you can stop the drip, save water, and avoid costly repairs in the future.