How to Remove Bathroom Sink Faucet Handle Without Screws Easily
Removing a bathroom sink faucet handle seems simple—until you realize there are no visible screws. If you’ve stared at your faucet, puzzled about how to get started, you’re not alone. Many modern sink handles are designed with hidden fasteners for a cleaner look, but that design can make even simple repairs feel like a mystery. The good news: with the right approach, you can safely remove almost any handle without damaging your faucet or countertop.
This guide walks you through everything you need to know, whether you’re replacing a cartridge, fixing a leak, or just cleaning mineral buildup. Along the way, you’ll discover smart tips that even experienced DIYers sometimes miss, and you’ll learn what to do if your handle feels stuck or refuses to budge.
Let’s dive in and get that handle off—no screwdrivers required.
Why Are There No Screws On Your Faucet Handle?
Many bathroom faucet handles are screwless by design. This is not a sign of a missing part—it’s a style choice and a way to prevent corrosion or tampering. Manufacturers often hide screws under decorative caps or use alternative attachment methods like set screws or friction fits. Some models snap into place with clever engineering, especially on newer or high-end faucets.
Understanding your specific handle type will help you remove it without causing damage. If you tug, pry, or twist in the wrong way, you might crack the handle or scratch the finish. Take a moment to identify your handle style before you begin.
Tools And Materials You’ll Need
Before you start, gather the right tools. You might not use all of them, but having these on hand prevents frustration if you encounter a stubborn handle.
- Flat-head screwdriver (for prying decorative caps)
- Plastic putty knife (protects finish when prying)
- Allen wrench set (for hidden set screws)
- Adjustable wrench or pliers
- Clean cloth
- Penetrating oil (like WD-40)
- Flashlight
- Rubber gloves (for grip and protection)
- Small container (to hold removed parts)
Having these tools ready saves time and helps prevent accidental scratches or lost screws. For example, using a plastic putty knife instead of a metal screwdriver when prying will protect delicate surfaces.

Credit: www.youtube.com
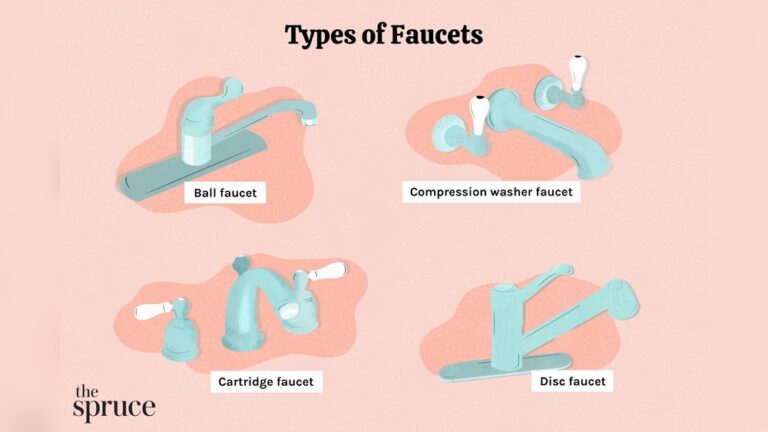
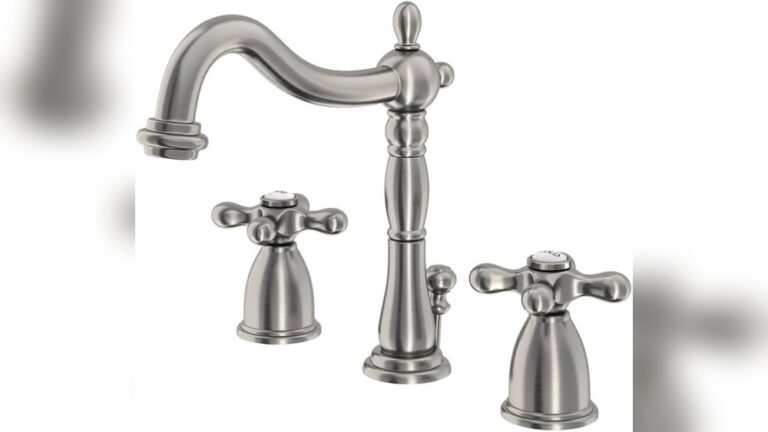
Types Of Bathroom Sink Faucet Handles Without Visible Screws
Not all screwless handles are the same. Here’s a breakdown of the most common types you’ll encounter:
| Handle Type | How It’s Attached | Removal Method |
|---|---|---|
| Single Lever | Hidden set screw (usually under a cap) | Remove cap, loosen set screw |
| Knob or Ball | Friction fit or hidden cap | Pull upward or pry cap, then pull |
| Double Handle | Decorative cover hides screw | Pop off cover, access screw |
| Cartridge Style | Secured by retainer clip or cap | Unscrew cap or remove clip |
If you can identify your handle from this table, you’ll know where to look for hidden fasteners or caps.
Step-by-step Guide To Removing A Screwless Faucet Handle
Every faucet is a bit different, but the following steps cover almost all designs. Read through the entire process before starting, so you know what to expect.
1. Turn Off The Water Supply
Before you touch the faucet, always shut off the water. Look under the sink for two valves (hot and cold). Turn them clockwise until they stop. This prevents leaks and water spray if you accidentally disturb the plumbing.
If you can’t find shut-off valves, turn off your home’s main water supply. Open the faucet to release any leftover pressure.
2. Plug The Drain
Tiny parts can easily fall into the drain. Place a stopper or a rolled-up towel in the sink to block the opening. This small step saves a lot of time and stress.
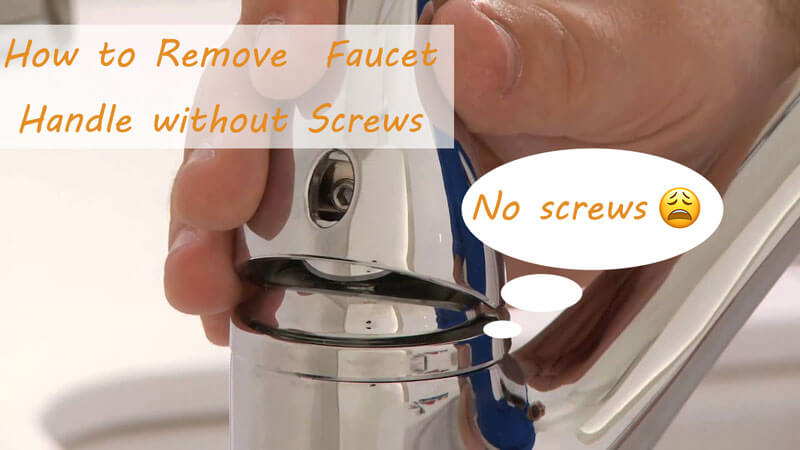
3. Examine The Handle For Hidden Caps Or Covers
Look closely at the handle’s base and top. Many screwless handles hide a set screw or retaining nut beneath a small decorative cap. These caps are often made of plastic or metal and may have a logo or a color indicator (red/blue for hot/cold).
Use a flashlight to check for a small seam or indentation. If you spot one, gently pry the cap off with your fingernail, a flat-head screwdriver, or a plastic putty knife. Be careful not to scratch the finish.
Non-obvious tip: Some handles have caps that are threaded, not just snapped in. Try twisting gently before prying—this can prevent breakage.
4. Look For A Set Screw
Once the cap is off, inspect the area for a small set screw. These are usually hexagonal (requiring an Allen wrench) or flat-head. Insert the correct tool and turn counterclockwise to loosen.
Don’t remove the screw completely—just enough to free the handle. Removing it fully can make reassembly harder, and small screws are easy to lose.
Beginner’s mistake: Trying to pull the handle off before loosening the set screw. If the handle won’t budge, check again for a hidden screw.
5. Removing Friction Fit Or Snap-on Handles
If there’s no cap or set screw, your handle may be held in place by friction or a snap-on fitting.
- Grip the handle firmly with your hand (wear rubber gloves for better grip).
- Pull straight up or outward—don’t twist or wiggle too much, as this can break internal parts.
- If it feels stuck, try gently rocking it side to side while pulling.
Advanced insight: Mineral deposits or corrosion often glue the handle in place. If it’s stuck, spray a small amount of penetrating oil at the base and wait 10–15 minutes before trying again.
6. Dealing With Cartridge-style Handles
Some modern faucets use a cartridge system with a decorative cap. The cap may unscrew by hand or require pliers.
- Wrap a cloth around the cap to protect the finish.
- Use adjustable pliers to unscrew the cap counterclockwise.
- Once the cap is off, pull the handle straight up to remove it.
Keep track of any retaining clips or washers—they’re essential for reassembly.
7. Handle Won’t Budge? Try These Troubleshooting Tips
Even after following all the steps, some handles are stubborn. Here’s what to do:
- Apply more penetrating oil around the base and wait longer.
- Tap gently with the handle of a screwdriver (not metal-to-metal) to break mineral bonds.
- Warm the area with a hairdryer for a few minutes—heat can expand the metal and loosen the handle.
- Use a faucet puller tool (available at hardware stores) for extremely stuck handles. This tool applies even upward force without damage.
Never use excessive force. If the handle still won’t move, it’s better to call a plumber than risk damaging the faucet body or cracking your sink.
8. Remove And Inspect Internal Components
Once the handle is off, you’ll see the cartridge, stem, or valve assembly. Take photos at each stage if you’re planning to reassemble the faucet—this makes the process much easier.
Wipe away any buildup with a clean cloth. If you see green or white deposits, this is limescale or corrosion. Clean with vinegar or a mild descaler.
Pro tip: Take the removed handle to a hardware store if you need to buy replacement parts. Matching the exact style avoids surprises during reassembly.
Common Problems And How To Solve Them
Removing a screwless faucet handle isn’t always smooth. Here’s how to handle common issues:
Handle Is Stripped Or Cracked
If the handle is stripped (the hole is rounded or damaged), it may spin without loosening. In this case, try wedging a flat-head screwdriver between the handle and base to gently pry it upward while pulling.
If the handle is cracked, replace it. Broken handles can’t provide proper leverage and may break further during removal.
Decorative Cap Won’t Come Off
If the cap is stuck, apply a few drops of penetrating oil around the seam and wait. Use a plastic tool to avoid damaging the finish. If it still won’t budge, wrap the area in a warm, damp cloth for a few minutes to soften mineral deposits.
Set Screw Is Rounded Off
A stripped set screw can be frustrating. Try using a slightly larger Allen wrench or a flat-head screwdriver if possible. If all else fails, carefully drill out the screw with a small bit (be very gentle to avoid damaging the faucet).
Old Faucet Handles
Older faucets may use rusted or calcified fasteners. Soak the base in vinegar and let it sit for an hour. This can help dissolve buildup and make removal possible.
What To Do After Removing The Handle
Once your handle is off, you have access to the cartridge, valve, or stem. This is your chance to fix leaks, replace worn parts, or clean mineral buildup.
- Inspect the cartridge or stem for cracks or wear.
- Wipe away any debris or corrosion.
- Lubricate moving parts with plumber’s grease if needed.
- If replacing, take the old part to the store for an exact match.
When reassembling, reverse the steps: seat the handle properly, tighten the set screw or replace the cap, and turn the water supply back on. Test for leaks and smooth operation.
When To Call A Professional
Most bathroom faucet handles can be removed with patience, but if you encounter any of the following, consider calling a plumber:
- The handle is fused to the stem and won’t move, even with penetrating oil and gentle force.
- The faucet body or countertop moves when you pull.
- You see signs of serious corrosion or damage.
- You’re uncomfortable with plumbing repairs or unsure about reassembly.
A professional has specialized tools and experience to prevent costly damage.
Key Safety Tips
- Always turn off the water supply before starting.
- Use protective gloves and eyewear.
- Don’t force stuck handles—apply more penetrating oil or seek help.
- Lay out removed parts in order to make reassembly easy.
- Keep children and pets away from the work area.
Credit: www.wowowfaucet.com
Cost And Time Estimates
Removing a screwless bathroom faucet handle is usually a quick DIY job. Here’s a general estimate:
| Task | Time Needed | Potential Cost |
|---|---|---|
| Identify handle type | 5–10 minutes | Free |
| Remove handle (easy) | 10–20 minutes | Free |
| Remove handle (stuck) | 30–60 minutes | $5–$10 (for oil/tool) |
| Professional help | Varies | $75–$150 |
DIY removal is affordable and quick if you follow the right steps.
Preventing Future Handle Problems
After removing and reinstalling your faucet handle, a few maintenance tips can save you time in the future:
- Apply plumber’s grease to threads and fittings during reassembly. This prevents corrosion and makes future removal easier.
- Clean mineral buildup regularly. Wipe the base of the handle with vinegar every few months.
- Check for leaks after reassembly. Early detection prevents water damage.
- Avoid overtightening set screws or caps. Hand-tighten, then give a gentle extra turn—too much force can strip threads or crack plastic.
- Record the faucet model and keep photos of the disassembled parts. This helps with future repairs or part replacement.
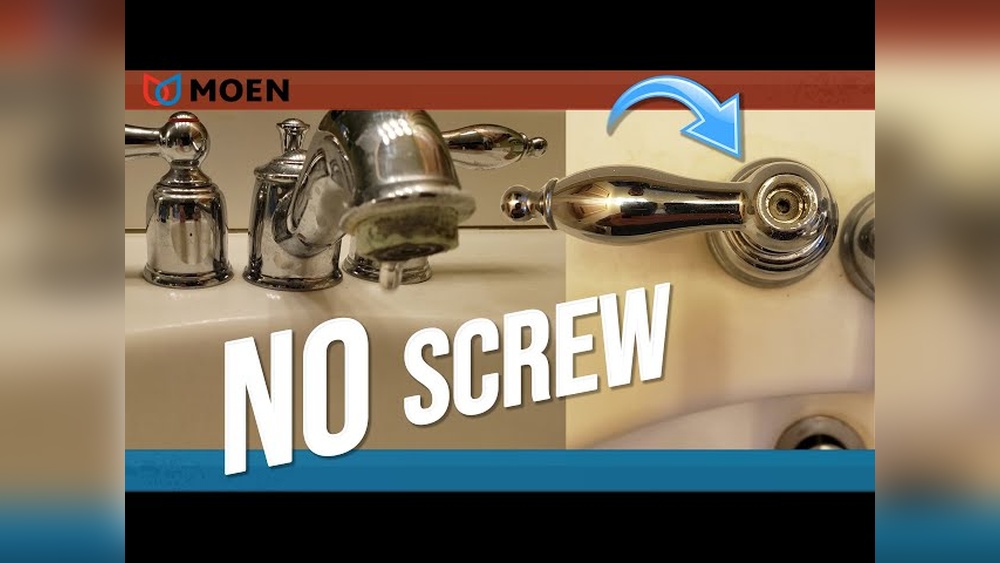
Real-world Example: Dealing With A Stuck Moen Handle
One homeowner noticed water leaking from their Moen bathroom faucet. The handle had no screws, and the decorative cap wouldn’t come off with gentle prying. After spraying a few drops of penetrating oil and waiting 30 minutes, the cap loosened enough to twist off by hand.
Underneath, a small Allen set screw held the handle. After loosening, the handle still refused to move. The homeowner used a hairdryer to warm the base, waited five minutes, and then pulled straight up while rocking gently. The handle came free, and the cartridge was replaced without damage.
Lesson: Patience, the right tools, and a gentle approach work better than force—even with tough handles.
Environmental Considerations
Most faucet handle parts are recyclable. If you replace your handle, check with your local recycling center about proper disposal. Avoid pouring harsh chemicals down the drain when cleaning mineral deposits—use vinegar or eco-friendly descalers.

Credit: diy.stackexchange.com
When Is It Time To Replace The Entire Faucet?
If your handle is extremely corroded, the finish is peeling, or the faucet is leaking from multiple points, it might be time for a full replacement. Newer faucets are more water-efficient and easier to maintain. If your faucet is more than 15 years old, replacement can save water and money in the long run.
Resources For Further Reading
If you’d like to see diagrams or watch video guides, the manufacturer’s website is often the best source. For a wide range of faucet styles and removal tips, check out the detailed guides at Family Handyman.
Frequently Asked Questions
How Do I Know If My Faucet Handle Has A Hidden Screw?
Look closely at your handle’s base and top for a small decorative cap. Gently pry or twist the cap to check underneath. Use a flashlight to spot a tiny set screw or retaining clip. If you see none, your handle may be friction-fit or snap-on.
What If The Handle Is Stuck And Won’t Come Off?
First, spray penetrating oil (like WD-40) around the base, and wait 10–15 minutes. Try gently rocking the handle while pulling upward. If it’s still stuck, use a hairdryer to warm the area, or consider a faucet puller tool. Avoid using excessive force.
Can I Remove A Faucet Handle Without Any Special Tools?
In many cases, yes. Most handles come off with just your hands and perhaps a flat-head screwdriver or plastic putty knife. However, an Allen wrench may be needed for hidden set screws. Having basic tools on hand makes the process safer and easier.
Is It Safe To Remove The Handle If I’m Not A Plumber?
Yes, as long as you shut off the water supply and follow the steps carefully. Take photos during disassembly to help with reassembly. If you encounter heavy corrosion or the handle won’t move, it’s wise to call a professional.
What Should I Do If I Lose A Set Screw Or Cap During Removal?
Check inside the sink and around your workspace. If you can’t find the part, take the handle to a hardware store to match it with a replacement. Many hardware stores carry universal faucet repair kits with spare screws and caps.
Removing a bathroom sink faucet handle without screws can be a straightforward DIY project with the right approach. By understanding your handle type and taking your time, you’ll avoid damage and keep your bathroom looking sharp. Whether you’re fixing a leak or updating your faucet’s look, these steps will help you get the job done confidently.