
How to Plumb a Wall Mounted Faucet: Step-by-Step Guide
Mounting a faucet on the wall is a decision that can transform both the look and function of your kitchen or bathroom. Wall mounted faucets free up counter space, create a modern and clean appearance, and make cleaning easier. But the process of plumbing a wall mounted faucet is more complex than installing a standard deck-mounted fixture.
Planning, the right tools, and careful attention to detail are essential for success.
If you are thinking about adding this feature to your home, you might feel unsure about where to start. Unlike traditional faucets, wall mounted options require water lines inside the wall, precise measurements, and strong supports. Even small mistakes can lead to leaks or a faucet that doesn’t line up with your sink.
In this guide, I’ll walk you through each stage of how to plumb a wall mounted faucet. By the end, you’ll know what tools you need, how to plan your project, and the step-by-step process from rough-in to final installation. Along the way, I’ll share real-world tips and highlight common beginner mistakes, so you can avoid costly errors. Whether you’re a confident DIYer or working with a plumber, this article will help you get the job done right.
What Makes Wall Mounted Faucets Different?
Before you pick up your wrench, it’s important to understand why wall mounted faucets require a different approach. Here’s what sets them apart:
- Water supply lines must be inside the wall, not under the sink.
- The faucet must be mounted to solid framing, not just drywall.
- The spout must line up perfectly with the sink below.
- Wall thickness and tile add complexity to measurements.
These differences mean you need to plan more carefully and expect extra steps compared to deck-mounted faucets.
Tools And Materials You’ll Need
Having the right equipment makes the job easier and safer. Here is a list of key tools and materials you should gather before starting:
- Wall mounted faucet (with rough-in valve)
- Pipe wrench
- Adjustable wrench
- Pipe cutter
- Drill and bits
- Level
- Measuring tape
- Stud finder
- Screwdriver set
- Plumber’s tape (Teflon tape)
- Copper or PEX piping and fittings
- Torch and solder (for copper pipes) or PEX crimp tool
- Support brackets
- Drop cloth
- Bucket
- Safety glasses and gloves
- Tile saw (if wall is tiled)
- Silicone sealant
- Supply line shut-off valves
If you’re working with copper pipes, you’ll need a torch and solder. For PEX piping, a PEX crimp tool and rings are required. Having everything ready before you open the wall will reduce stress and prevent mistakes.
Planning And Measuring: The Foundation Of Success
Choosing Faucet Height And Position
The height and placement of your faucet is critical. Too high, and water splashes everywhere; too low, and it’s awkward to use. The standard recommendation is:
- 8 to 10 inches above the sink rim for bathroom faucets
- 10 to 12 inches for kitchen faucets
But the exact measurement depends on the faucet design and sink depth. Always check the manufacturer’s guide for the specific faucet you buy.
Aligning Faucet With Sink
The faucet spout should be centered over the drain. Measure the sink’s width and mark the exact center on the wall. Double-check this measurement—moving pipes after they’re installed is a major headache.
Accounting For Wall Thickness And Tile
Don’t forget to include the thickness of drywall, backer board, and tile in your measurements. Failing to do this is one of the most common mistakes beginners make, resulting in a faucet that sticks out too far or not far enough.
Confirming Water Supply Location
Use a stud finder to check for framing in the wall. You’ll need at least one stud to anchor the faucet. Also, check that you have easy access to hot and cold supply lines.
Rough-in Plumbing: Setting Up The Water Lines
Rough-in is the stage where you install the pipes and support for the faucet, but don’t yet finish the wall. Precision here is vital for a good result.
Shutting Off Water Supply
Always shut off the main water supply before working. Open a nearby faucet to relieve any pressure in the lines. Place a bucket under your work area to catch any drips.
Opening The Wall
Cut a hole in the drywall or tile. Make it large enough for easy access, but small enough to patch later. If the wall is tiled, use a tile saw to make clean cuts. Protect surfaces with a drop cloth.
Installing Support Blocking
Wall mounted faucets must be attached to solid wood blocking, not just drywall. Cut a 2×6 or 2×8 piece of lumber to fit between the wall studs. Secure it with screws so it is perfectly level and at the right height.
This blocking will hold the weight of the faucet and resist the force of daily use.
Running The Water Lines
Decide whether you’ll use copper or PEX piping. Both are common in modern plumbing, but have different installation methods:
- Copper: Requires measuring, cutting, and soldering pipes and fittings.
- PEX: Easier for beginners, uses crimp rings and a special tool.
Run hot and cold water lines to the blocking. Leave extra length so you can make fine adjustments later. Be sure the pipes are level and spaced correctly for your faucet’s rough-in valve.
Securing The Rough-in Valve
Attach the faucet’s rough-in valve to the blocking. Make sure it is:
- Level (use your level tool)
- At the correct depth (account for wall finish)
- Centered over the sink
Secure tightly with screws. Connect the water lines to the valve using plumber’s tape at all threaded joints to prevent leaks.
Pressure Test
Before closing the wall, turn on the water supply and check for leaks. This is your chance to fix problems while the pipes are exposed.
If everything looks good, turn the water off again and drain the lines.

Credit: www.youtube.com
Wall Repair And Preparation
Once the rough-in plumbing is done and you’ve checked for leaks, it’s time to close the wall.
Patching Drywall
Cut new drywall to fit the opening you made. Screw it into place, tape the seams, and apply joint compound. Sand smooth when dry.
Tiling (if Needed)
If your wall is tiled, cut tiles to fit around the faucet’s rough-in. Use a tile saw for accurate cuts. Allow for a small gap around the pipe for expansion and seal with silicone later.
Priming And Painting
Prime and paint the repaired area, or grout and seal the tile as needed. Let everything dry fully before moving on.
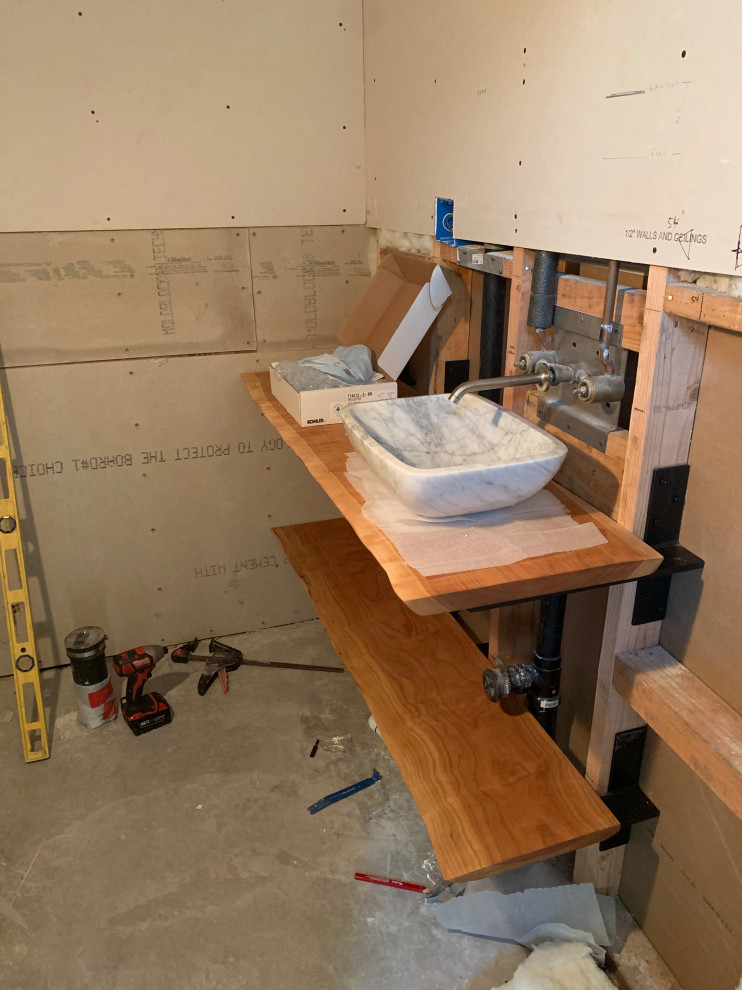
Final Faucet Installation
This is the stage where your project takes shape. Here’s how to install the visible parts of the wall mounted faucet.
Installing The Faucet Trim
Slide the faucet trim and handles onto the rough-in valve. Follow the manufacturer’s instructions, as designs vary.
- Tighten all set screws with a screwdriver or Allen key.
- Make sure the spout and handles are level and aligned.
- For two-handle models, ensure hot and cold are on the correct sides.
Sealing The Gaps
Apply a thin bead of silicone sealant around the base of the faucet where it meets the wall. This prevents water from leaking behind the wall, which could cause mold or rot.
Connecting Supply Lines
If your faucet has flexible supply lines, connect them to the shut-off valves under the sink. Use plumber’s tape on threaded fittings to prevent leaks.
Final Leak Check
Turn on the water supply. Check all connections for leaks—both at the faucet and under the sink. Run the water for a few minutes and inspect closely.
If you see any drips, tighten connections or reapply plumber’s tape as needed.
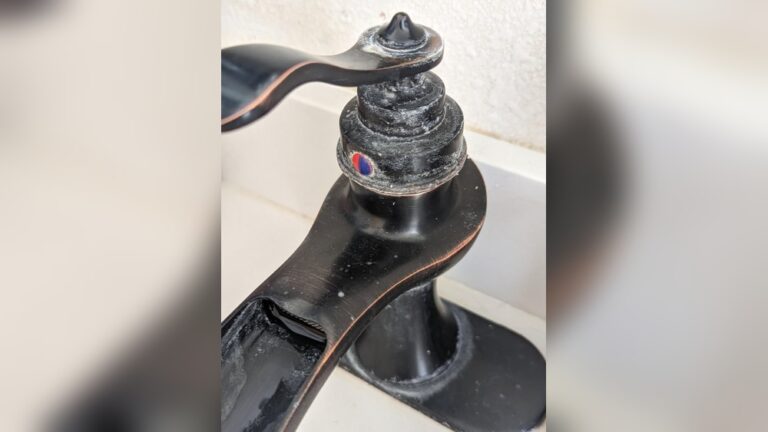
Common Mistakes And How To Avoid Them
Even experienced DIYers sometimes make errors with wall mounted faucets. Here are the most common pitfalls and how to prevent them:
1. Incorrect Height Placement
Double-check measurements before installing the support blocking and rough-in valve. Remember to include finished wall thickness.
2. Misaligned Spout And Sink
Triple-check your centerline markings before securing pipes and valves. Small misalignments are very noticeable with wall-mounted fixtures.
3. Weak Support
Never rely on drywall alone. Always use solid wood blocking.
4. Forgetting A Pressure Test
Testing before closing the wall saves time and money. Even a small leak can cause big problems inside a wall.
5. Improper Sealant Use
Apply silicone carefully around all points where water could enter the wall.
6. Not Using Plumber’s Tape
Plumber’s tape (Teflon tape) is essential for threaded fittings. It helps prevent leaks.
7. Skipping Shut-off Valves
Install shut-off valves for both hot and cold lines. This makes future repairs much easier.
Table: Copper Vs. Pex For Wall Mounted Faucets
Here’s how the two main types of supply piping compare:
| Feature | Copper | PEX |
|---|---|---|
| Ease of Installation | Requires soldering; harder for beginners | Flexible; easier for DIY |
| Durability | Very durable, long lifespan | Resistant to freezing and bursting |
| Cost | More expensive | Less expensive |
| Repair | More difficult | Easy to cut and join |
| Corrosion | Can corrode over time | Does not corrode |
Step-by-step Example: Installing A Wall Mounted Bathroom Faucet
Let’s walk through a real-world example for a bathroom faucet.
1. Select The Faucet
Choose a wall mounted faucet with a separate rough-in valve. Read the instructions for recommended mounting height.
2. Mark The Wall
Measure and mark the centerline of the sink, then mark the desired faucet height.
3. Open The Wall
Cut out a section of drywall or tile where the faucet and pipes will go.
4. Install Blocking
Fit a 2×6 between the studs at the right height and screw it securely.
5. Run Water Lines
Install PEX or copper lines for hot and cold water, spaced to fit the faucet’s rough-in valve.
6. Attach Rough-in Valve
Secure the valve to the blocking, make sure it’s level and at the correct depth.
7. Test For Leaks
Turn on the water and check all connections.
8. Close The Wall
Patch drywall or retile as needed. Prime, paint, or grout.
9. Install Faucet Trim
Fit the handles and spout. Tighten all screws.
10. Seal And Test
Apply silicone around the faucet base and test for leaks.
Table: Typical Costs For Wall Mounted Faucet Installation
Here’s a cost breakdown for a DIY project versus hiring a plumber:
| Item | DIY | Professional |
|---|---|---|
| Wall Mounted Faucet (mid-range) | $120 – $250 | $120 – $250 |
| Materials (pipes, fittings, sealant) | $60 – $120 | Included in service |
| Labor | Free (your time) | $300 – $600 |
| Total | $180 – $370 | $420 – $850 |
Note: These costs are estimates and may vary by location and complexity.
Credit: www.reddit.com
Advanced Tips For A Professional Finish
Use A Deep Box For Tiled Walls
If your wall is finished with thick tile or stone, use an extra-deep rough-in box so the faucet extends the proper distance beyond the wall. This avoids a spout that’s too short.
Install Access Panels
For bathrooms with limited access to plumbing, consider installing a small access panel on the opposite side of the wall. This makes future repairs much easier without breaking tiles.
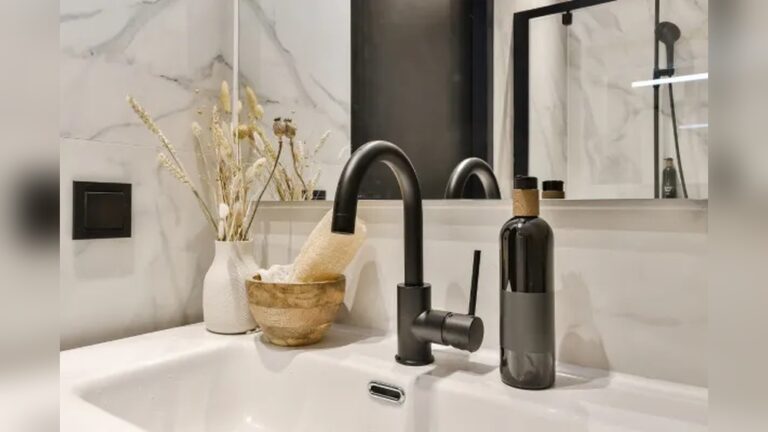
Match Faucet Finish To Other Fixtures
For a coordinated look, choose a faucet finish that matches your shower, towel bars, and other hardware.
Check Local Building Codes
Some regions have specific codes about faucet height or the types of valves allowed. Always check your local requirements before starting.
When To Call A Professional
While a skilled DIYer can install a wall mounted faucet, there are times when it’s smart to hire a plumber:
- If you find old or damaged pipes in the wall
- If the wall is load-bearing and needs structural changes
- If you are not comfortable soldering or using PEX tools
A professional can ensure everything is up to code and leak-free.
Table: Wall Mounted Faucet Vs. Deck Mounted Faucet
To help you decide if a wall mounted faucet is right for you, see how they compare to traditional models:
| Feature | Wall Mounted Faucet | Deck Mounted Faucet |
|---|---|---|
| Space Saving | Excellent | Good |
| Cleaning | Easier (no base on sink) | Standard |
| Installation Difficulty | Harder | Easier |
| Repairs | Harder (inside wall) | Easier (under sink) |
| Modern Look | Yes | Varies |
Maintenance And Long-term Care
Once your faucet is installed, a little care will keep it working and looking great:
- Clean regularly: Wipe down with a soft cloth to prevent water spots.
- Check for leaks: Inspect the wall and under the sink for signs of moisture every few months.
- Tighten handles and spout: Over time, screws can loosen. Tighten gently if needed.
- Replace washers or cartridges: If the faucet drips, replace these parts as per the manufacturer’s instructions.
Credit: www.houzz.com
Real-world Insights Beginners Often Miss
- Wall mounted faucets reveal any mistake in alignment—measure and check three times before you drill or cut.
- Professional plumbers often use cardboard cutouts to test faucet and sink placement before committing to pipe locations. You can do this too with simple templates.
- If the faucet rough-in is too deep or too shallow, you may need to use special extension kits or trim plates. These are available from most faucet manufacturers.
- Always keep the manufacturer’s instructions. Each faucet model can have unique requirements for spacing, wall depth, and installation steps.
Where To Learn More
If you want to see videos or get more technical details, Family Handyman offers practical guides and troubleshooting advice for wall mounted faucets.
Bringing It All Together
Plumbing a wall mounted faucet is a project that rewards careful planning and attention to detail. By understanding the differences from standard faucets, preparing your tools and materials, and following each step, you can achieve a result that looks beautiful and works flawlessly.
Don’t rush the measuring or rough-in stage—these are the foundation of a leak-free and well-aligned faucet. And remember, it’s always okay to call in a professional for complex situations.
With patience and the right approach, you’ll add a touch of style and convenience to your kitchen or bath that stands out for years to come.
Frequently Asked Questions
How High Should A Wall Mounted Faucet Be Above The Sink?
For most bathroom sinks, the faucet should be 8 to 10 inches above the rim. For kitchen sinks, aim for 10 to 12 inches. Always check your faucet’s instructions for the best height.
Can I Install A Wall Mounted Faucet On A Tiled Wall?
Yes, you can. Use a tile saw to cut openings for the pipes. Make sure to use a deep enough rough-in box to account for the thickness of the tile.
What Is The Biggest Mistake When Installing Wall Mounted Faucets?
The most common mistake is not measuring wall thickness (tile, drywall) when setting the rough-in depth. This leads to faucets that stick out too far or not enough.
Do Wall Mounted Faucets Need Special Plumbing?
Yes. Water lines must be run inside the wall and connected to a rough-in valve. This is more complex than standard faucets, so plan carefully.
How Do I Prevent Leaks Behind The Wall?
Always use plumber’s tape on threaded joints, pressure test before closing the wall, and seal around the faucet with silicone to prevent water from getting inside the wall.