How to Remove a Recessed Faucet Aerator Easily and Safely
Removing a recessed faucet aerator seems simple—until you try it for the first time. You twist, pull, and wonder if you’re doing it right. Sometimes, the aerator is stuck, covered in hard water deposits, or hidden so deep you can barely see it.
But don’t worry. With the right steps, tools, and a bit of patience, you can remove even the most stubborn recessed aerator without damaging your faucet.
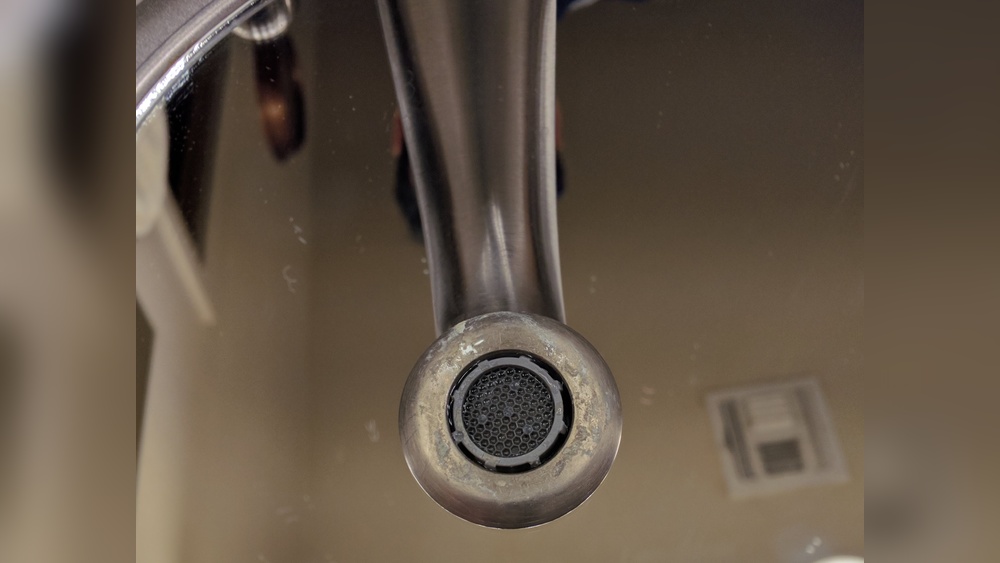
Aerators are small mesh screens at the tip of most faucets. They mix air into the water stream, helping save water and reduce splashing. Over time, mineral buildup, sand, or dirt can block the aerator. When this happens, water pressure drops, or the stream sprays in strange directions.
Cleaning or replacing your aerator can solve these problems fast.
This guide gives you everything you need to know about removing a recessed faucet aerator. You’ll learn why aerators are important, how to identify your aerator type, what tools to use, and practical step-by-step instructions. We’ll cover how to deal with stuck or damaged aerators and share tips to prevent future problems.
By the end, you’ll feel confident tackling this home maintenance task—even if you’ve never tried before.
Why Remove A Recessed Faucet Aerator?
Most people don’t think about their faucet’s aerator until there’s a problem. But understanding why you should remove and clean or replace it is key to keeping your faucet working well.
A blocked aerator can cause:
- Low water pressure
- Irregular water spray
- Noisy faucet operation
- Contaminated water stream
Removing the aerator lets you clean out debris, flush out mineral buildup, and restore normal water flow. If you live in an area with hard water, you might need to do this every few months.
Sometimes, you may want to install a new aerator for water conservation, or you may need to remove it for repairs. If your faucet has a recessed aerator, it sits inside the spout, making it harder to reach. This is different from standard aerators, which are easy to unscrew by hand.
Understanding Recessed Faucet Aerators
Not all aerators are the same. Knowing your type helps you choose the right removal method and tools.
What Is A Recessed Aerator?
A recessed aerator sits deep inside the faucet spout. It is not visible from the outside and cannot be removed with your fingers. Manufacturers use this design for a cleaner look and to prevent theft or tampering in public places.
Common Types Of Recessed Aerators
Here are the main designs you might find:
- Hidden Cache Aerators – These are set inside the spout and require a special key or tool.
- M24/M28 Male or Female Aerators – These use internal threads and may need an aerator wrench.
- Tamper-Resistant Aerators – Designed for public restrooms, needing special removal tools.
Aerators also come in different sizes. The most common are:
- M16.5 (junior)
- M18 (Tom Thumb)
- M21.5
- M24 (standard)
- M28 (large)
If you’re unsure which you have, check your faucet’s manual or measure the opening.
Why Are Recessed Aerators Used?
Manufacturers use recessed aerators for:
- Aesthetics: Sleeker, modern look.
- Security: Harder to remove, so they’re common in public or commercial faucets.
- Splash reduction: Better water control.
Knowing your aerator type is the first step before removal.
Tools And Supplies You Need
Having the right tools makes the job faster and reduces the risk of damaging your faucet. Some recessed aerators require specialized keys, while others can be removed with common household tools.
Essential Tools
- Aerator Removal Key: Most recessed aerators need a special key (also called a cache key). These are small, plastic or metal tools designed to fit into the aerator’s notches.
- Needle-Nose Pliers: Useful if the aerator is stuck or if you don’t have a key.
- Flathead Screwdriver: For prying out stuck aerators.
- Adjustable Wrench: For larger, stubborn aerators (use with care).
- White Vinegar: For cleaning mineral deposits.
- Soft Cloth/Towel: To protect faucet finish and catch drips.
- Flashlight: To see inside the faucet spout.
- Small Bowl: To soak the aerator for cleaning.
Optional Supplies
- Rubber Gloves: For better grip and to protect your hands.
- Teflon Tape: If you need to reseal the threads.
- Replacement Aerator: In case the old one is damaged.
Aerator Removal Key Sizes
Aerator keys come in different sizes. Here’s a quick reference:
| Aerator Size | Common Faucet Types | Key Color (Often) |
|---|---|---|
| M16.5 (Junior) | Small bathroom faucets | Red |
| M18 (Tom Thumb) | Compact faucets | Blue |
| M21.5 | Mid-size faucets | Green |
| M24 (Standard) | Most kitchen/bathroom | Yellow |
| M28 (Large) | Commercial/Large | Gray |
If you’re not sure, buy a multi-size set. They are affordable and cover most needs.
Step-by-step Guide: How To Remove A Recessed Faucet Aerator
Ready to get started? Follow these steps for a smooth process. Take your time, and don’t force anything—faucet threads can be delicate.
1. Turn Off The Water (optional)
Most aerator removal can be done with the water on. But if you’re worried about splashing, turn off the supply under the sink. Place a towel in the sink to catch any small parts.
2. Identify The Aerator Type
Shine a flashlight into the faucet spout. Look for:
- Notches or slots inside (for a cache key)
- Threads for a screw-in aerator
- No visible parts means the aerator is deeply recessed
If you see notches, you need the matching aerator key.
3. Insert The Aerator Key
Take the aerator key and gently push it into the opening. Align the tabs of the key with the notches inside the aerator. You’ll feel it “seat” into place.
If you don’t have a key, try needle-nose pliers or a small screwdriver. Be careful not to scratch the faucet.
4. Twist Counterclockwise
Turn the key (or pliers) counterclockwise to unscrew the aerator. Most aerators loosen this way.
If it’s stuck, don’t force it. Instead, spray some white vinegar into the opening and let it sit for 10–15 minutes. This helps dissolve mineral deposits.
5. Remove The Aerator
Once loosened, pull the aerator straight out. Sometimes, the key will pull it out with the threads. If it’s still stuck, gently wiggle with pliers.
Be sure to collect any washers or O-rings that may come out with the aerator.
6. Inspect And Clean
Check the aerator for dirt, sand, or mineral buildup. If it’s clogged, soak it in vinegar for 30 minutes, then brush with an old toothbrush.
If it’s damaged or corroded, replace it with a new one of the same size.
7. Flush The Faucet
Before reinstalling, run the water for a few seconds to flush out any loose debris inside the faucet. This prevents new clogs.
8. Reinstall The Aerator
Screw the cleaned or new aerator back into the faucet using the key. Turn clockwise to tighten, but do not over-tighten.
Check for leaks by running the water. If it drips around the aerator, remove and reseat it, or use a bit of Teflon tape.
9. Clean Up
Wipe the faucet and sink area with a soft cloth. Store the aerator key in a safe place for future use.
Dealing With A Stuck Or Damaged Aerator
Sometimes, aerators are so clogged or corroded that they won’t budge. Here’s what to do if you run into trouble.
When The Aerator Won’t Turn
- Soak with Vinegar: Spray or soak the area with white vinegar for 30 minutes. Try again with the key.
- Use Pliers with Care: If you use pliers, wrap the jaws with a cloth to avoid scratching the faucet.
- Apply Penetrating Oil: A small amount of WD-40 can help, but avoid getting it on faucet finishes.
- Tap Gently: Lightly tap the faucet with a rubber handle to loosen deposits.
Never force the aerator. You could strip the threads or break the faucet.
Removing A Broken Aerator
If the aerator crumbles or breaks inside the spout:
- Use needle-nose pliers to pull out broken pieces.
- A flathead screwdriver can help loosen fragments.
- For very stuck parts, use a small screw extractor (available at hardware stores).
If you can’t remove it, call a plumber. Forcing it can cause expensive faucet damage.
Cleaning And Maintaining The Aerator
Regular cleaning keeps your faucet working well and extends the life of your aerator.
How Often To Clean
- Every 3–6 months for most homes
- Monthly if you have hard water or notice low pressure
Cleaning Steps
- Remove the aerator as described above.
- Soak in white vinegar for 30–60 minutes.
- Scrub with an old toothbrush.
- Rinse and inspect for damage.
- Reinstall and test the faucet.
When To Replace
Replace the aerator if you see:
- Cracks in the screen or housing
- Corrosion that won’t clean off
- Persistent leaks after reinstalling
Replacement aerators are inexpensive and available at hardware stores or online.
Aerator Removal Mistakes To Avoid
Many beginners make the same errors. Here are the most common mistakes—and how to avoid them.
1. Using The Wrong Tool
Using pliers or wrenches without a key often scratches or dents the faucet. Always try the correct aerator key first.
2. Forcing A Stuck Aerator
Applying too much force can strip the threads or break the aerator, making removal much harder.
3. Losing Small Parts
Washers and O-rings often fall into the sink. Plug the drain or place a towel to catch parts.
4. Not Checking For Leaks
Always test the faucet after reinstallation. Even a small leak can cause water damage over time.
5. Skipping Regular Cleaning
Waiting too long between cleanings can lead to stubborn buildup and reduce faucet lifespan.
How To Choose The Right Replacement Aerator
If your aerator is damaged, you’ll need a new one. Choosing the right size and type is important for proper faucet function.
Step 1: Measure The Aerator
- Use a ruler or caliper to measure the diameter of the opening (in millimeters).
- Compare with the size chart above.
Step 2: Select The Correct Thread
- Male Aerator: Threads are on the outside.
- Female Aerator: Threads are on the inside.
Check your faucet spout to match the thread type.
Step 3: Choose Flow Rate
Aerators come in different flow rates (usually printed on the side in liters per minute or gallons per minute).
| Flow Rate (L/min) | Typical Use | Water Savings |
|---|---|---|
| 2.2 | Standard kitchen/bath | Standard |
| 1.5 | Water conservation | 20–30% less |
| 1.0 | High-efficiency | Up to 50% less |
Higher flow rates give more pressure but use more water. For most homes, 1. 5 L/min is a good balance.
Step 4: Consider Special Features
Some aerators offer:
- Swivel or dual function: Switch between spray and stream.
- Anti-clog screens: Better for hard water.
- Tamper-resistant design: Needed for public bathrooms.
Step 5: Buy From A Trusted Source
Choose quality brands like Moen, Delta, or Kohler to ensure a good fit and durability. If you’re unsure, bring your old aerator to the store for comparison.

Credit: www.youtube.com
Preventing Aerator Problems In The Future
Regular care keeps your faucet running smoothly and saves water.
- Install a water softener if you have hard water. This reduces mineral deposits.
- Flush pipes after plumbing repairs to clear debris before reinstalling the aerator.
- Clean regularly (every few months) to prevent buildup.
- Use a quality replacement aerator to avoid leaks and poor performance.
Real-world Examples And Troubleshooting
Let’s look at some real situations you might face.
Example 1: The Key Doesn’t Fit
Sometimes, the aerator key won’t fit your faucet. This usually means you have an unusual size or a non-standard brand.
Solution:
Try a universal aerator removal tool, which adjusts to different sizes. If that doesn’t work, contact the faucet manufacturer for the correct key.
Example 2: Water Still Sprays After Cleaning
If your faucet still sprays unevenly after cleaning the aerator, check for:
- Cracks in the aerator housing
- Worn-out washers
- Debris inside the faucet spout
Solution:
Replace the aerator and flush the faucet again.
Example 3: The Aerator Is Stuck Due To Limescale
In hard water areas, limescale can glue the aerator in place.
Solution:
Soak a paper towel in vinegar and wrap it around the faucet tip. Let it sit for an hour, then try removing the aerator.
Example 4: Aerator Drops Into The Sink
Small parts can slip down the drain.
Solution:
Plug the drain with a stopper or cloth before starting. If a part falls in, use a magnet or small tool to retrieve it.
Example 5: Faucet Leaks After Reinstallation
A leak may happen if the aerator isn’t seated properly or the washer is missing.
Solution:
Remove the aerator, check the washer, and reinstall carefully. Use Teflon tape if needed.

Credit: diy.stackexchange.com
Comparing Recessed Vs. Standard Faucet Aerators
It helps to understand how recessed aerators differ from standard ones.
| Feature | Recessed Aerator | Standard Aerator |
|---|---|---|
| Location | Inside faucet spout | Tip of faucet spout |
| Removal Tool Needed | Usually yes (key) | Usually no (hand) |
| Appearance | Sleek, hidden | Visible, protruding |
| Security | High (tamper-resistant) | Low |
| Maintenance | More difficult | Easier |
Recessed aerators offer a modern look and better security but need more effort to remove and maintain.
Two Non-obvious Insights For Beginners
- Aerator Size Isn’t Universal: Many beginners think all aerators are the same size, but even faucets from the same brand can have different sizes. Always measure before buying a replacement or removal tool.
- Hard Water Makes Removal Difficult: In areas with hard water, mineral buildup can glue the aerator in place. Pre-soaking with vinegar before trying to remove it often saves time and prevents damage.

Credit: www.youtube.com
Frequently Asked Questions
How Do I Know If My Faucet Has A Recessed Aerator?
Shine a flashlight into the faucet spout. If you don’t see a mesh screen at the tip, but notice notches or a screen several millimeters inside, you have a recessed aerator. Most modern, sleek faucets use this design.
What If I Can’t Find An Aerator Removal Key?
You can buy a universal cache key at hardware stores or online. If you need a key urgently, try using needle-nose pliers, but wrap the jaws with a cloth to avoid scratching. For unusual sizes, contact the faucet manufacturer or check the Wikipedia page on faucet aerators for more details.
Can I Run The Faucet Without The Aerator?
Yes, but the water may splash more and feel less smooth. Running the faucet without the aerator for a short time is useful to flush out debris, but reinstall a clean or new aerator for best performance.
Why Is My New Aerator Leaking?
Leaks can happen if the aerator isn’t seated correctly, the washer is missing, or the threads are damaged. Remove the aerator, check for dirt or damage, and reinstall carefully. Use Teflon tape if leaks persist.
How Often Should I Replace My Faucet Aerator?
Replace your aerator every 1–2 years, or sooner if you notice reduced water flow, damage, or leaks. Regular cleaning (every 3–6 months) can extend its life and keep your faucet working well.
Removing a recessed faucet aerator may seem challenging, but with patience and the right tools, anyone can do it. Regular cleaning and smart maintenance will keep your faucet working smoothly for years. If you ever have trouble, don’t hesitate to seek help from a professional or trusted resources.