How to Replace a RV Shower Faucet: Step-by-Step Guide
Replacing the shower faucet in your RV can seem like a big job, but with the right steps and some patience, you can do it yourself. Many RV owners face leaks, low water pressure, or old and ugly fixtures. Sometimes, a simple faucet upgrade can make your small bathroom feel fresher and more comfortable.
In this guide, you’ll learn how to choose the right faucet, prepare for installation, and swap out the old one safely. Whether you’re a new RV owner or someone looking to avoid costly repair shops, this article will show you the process from start to finish, plus share tips that most first-timers miss.
Why Replace An Rv Shower Faucet?
Many people wonder if changing the RV shower faucet is really worth the trouble. There are several reasons why this project is a good investment:
- Leaking faucets waste water, which is a big problem when camping off-grid.
- Old plastic faucets can break easily, causing unexpected problems on the road.
- Better water pressure: Some new faucets are designed to improve the shower experience, even with limited RV water systems.
- Modern designs make your bathroom look newer and help with resale value.
Upgrading your faucet can also help with hygiene, as newer models are often easier to clean and less likely to collect mold.
Tools And Materials You’ll Need
Before you start, having the right tools and supplies is important. Here’s what you’ll typically need:
- New RV shower faucet (make sure it matches your RV’s plumbing setup)
- Adjustable wrench
- Screwdrivers (Phillips and flat-head)
- Plumber’s tape (Teflon tape)
- Pliers
- Bucket or towels
- Silicone sealant (for waterproofing)
- Flashlight (for dark corners behind the shower wall)
- Utility knife
- Gloves (optional, for better grip and safety)
Non-obvious Tools
Sometimes, you might need a basin wrench for hard-to-reach nuts or a mirror to see behind the panel. These aren’t always listed in basic guides but can make the job much easier.
Credit: www.youtube.com
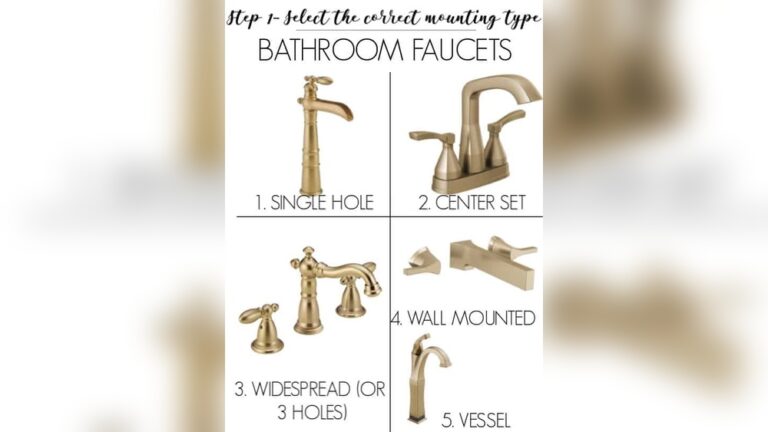
How To Choose The Right Rv Shower Faucet
Not all RV shower faucets are the same. Picking the right one is about more than looks. Here’s what to consider:
1. Matching Pipe Spacing
Most RV faucets have either 4-inch or 8-inch spacing between the hot and cold connections. Measure your old faucet before buying a new one.
2. Material Quality
Plastic faucets are cheap and light, but they can crack. Metal faucets last longer but are heavier and sometimes cost more. Look for brass or stainless steel parts if you want durability.
3. Water-saving Features
Some modern RV faucets have shut-off valves or “trickle” settings that help save water while you soap up. This is very helpful for boondocking or dry camping.
4. Design And Fit
Choose a faucet that fits the style and size of your shower. Some RVs have small shower stalls, so a big faucet might get in the way.
5. Brand And Warranty
Stick to trusted brands or check reviews. A good warranty can save you money if something fails early.
| Feature | Plastic Faucet | Metal Faucet |
|---|---|---|
| Durability | Low | High |
| Weight | Very light | Heavier |
| Price | Low | Medium-High |
| Best for | Budget upgrades | Long-term use |
Preparing For The Replacement
Preparation is often the step that saves you the most time. Don’t skip it.
Turn Off The Water Supply
Most RVs have a main water shut-off valve. Turn it off and open the shower faucet to drain any leftover water. If you’re connected to city water, disconnect the hose.
Check For Hidden Leaks
Look under the shower or behind panels for any signs of water damage. Fix leaks before installing the new faucet.
Clear The Work Area
Remove any shower caddies, soap dishes, or curtains. Lay down towels to protect the floor and catch drips.
Take A Photo
Snap a picture of the old faucet and connections. This helps if you forget how things fit together.
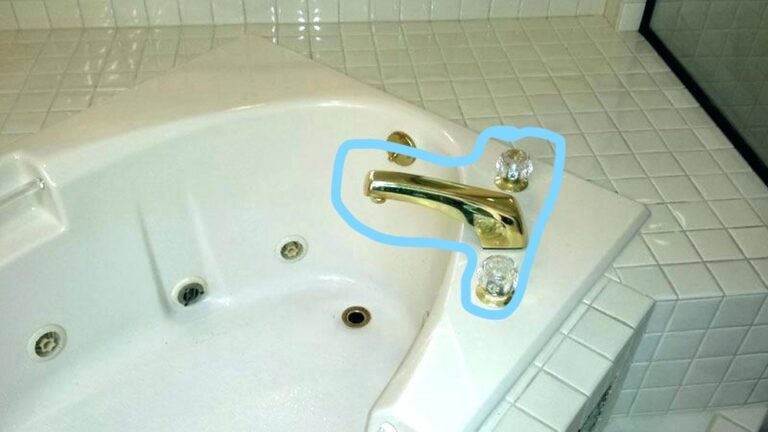
Removing The Old Rv Shower Faucet
Taking out the old faucet is straightforward, but working in tight spaces can be tricky. Here’s how to do it:
- Unscrew the handles or cover plate: Use a screwdriver to remove any visible screws. Some RV faucets have caps hiding the screws.
- Disconnect the water lines: Using an adjustable wrench, gently loosen the nuts connecting the faucet to the hot and cold water pipes.
- Remove mounting nuts or bolts: These hold the faucet to the shower wall. Use pliers or a basin wrench for hard-to-reach spots.
- Pull out the old faucet: Carefully wiggle it free. Some caulk or sealant may hold it in place, so use a utility knife to cut through if needed.
- Clean the area: Remove any old caulk, debris, or gunk before installing the new fixture.
Common Problems
- Stuck nuts or fittings: Spray with a little penetrating oil and wait a few minutes.
- Cracked pipes: Stop and replace the pipe section before continuing.
Installing The New Rv Shower Faucet
Now comes the main part. Take your time and double-check every step.
Step 1: Dry Fit The Faucet
Hold the new faucet in place to check if the holes and connections line up. If not, you may need a different model or adapter fittings.
Step 2: Wrap Threads With Plumber’s Tape
Wrap Teflon tape around the threads of the water supply lines. This helps prevent leaks.
Step 3: Attach The Water Lines
Connect the hot and cold supply lines to the new faucet. Hand-tighten the nuts, then use a wrench for a snug fit—but don’t overtighten.
Step 4: Secure The Faucet
Use the mounting nuts or bolts to fasten the faucet to the shower wall. Make sure it sits flat and does not wiggle.
Step 5: Seal The Edges
Apply a thin line of silicone sealant around the base of the faucet to keep water from leaking behind the wall.
Step 6: Reconnect The Water Supply
Turn the main water supply back on. Watch closely for leaks at all connections.
Step 7: Test The Faucet
Turn on both hot and cold water. Check for good flow, steady pressure, and no drips. Adjust as needed.
| Step | What to Check |
|---|---|
| Dry Fit | Holes and pipe spacing match |
| Wrap Threads | Teflon tape covers all threads |
| Attach Water Lines | Nuts are snug, not overtightened |
| Seal Edges | Even bead of silicone, no gaps |
| Test Faucet | No leaks, good water flow |
Troubleshooting Common Issues
Low Water Pressure
If the pressure is weaker than before, check for:
- Clogged aerator in the new faucet
- Kinked or bent supply lines
- Debris inside the faucet from installation
Remove the showerhead and run water directly to clear out any debris.
Leaks At Connections
Most leaks are caused by loose nuts or missing Teflon tape. Shut off the water, tighten connections, and reapply tape if needed.
Faucet Doesn’t Fit
If your new faucet doesn’t match the holes, you might need adapter plates or flexible hoses. Some RVs use non-standard plumbing, so always measure before buying.
Handles Turn Wrong Direction
Some faucets have reversible cartridges. Check the manual to see if you can flip them for correct hot/cold operation.
Pro Tips For A Smooth Installation
Here are a few tips that even experienced RV owners sometimes overlook:
- Label your water lines before disconnecting. This prevents mixing up hot and cold.
- Keep a towel handy to catch drips when removing old pipes.
- Don’t overtighten plastic parts; they can crack and leak.
- Check other plumbing fixtures: While the water is off, it’s a good time to inspect the sink or toilet for leaks or wear.
Safety Tips
- Always turn off the water supply before starting.
- Wear gloves if working with sharp tools or old plumbing.
- Work slowly to avoid damaging hidden pipes.
- Use a flashlight: RV plumbing is often in dark, cramped spaces.
Special Considerations For Older Rvs
If your RV is more than 10 years old, you may face extra challenges:
- Brittle pipes: Old plastic pipes can snap when you try to disconnect them.
- Non-standard fittings: You might need adapters to match new faucets.
- Hidden leaks or rot: Check for soft spots around the shower wall, which can mean water damage.
If you find water damage, fix it before installing the new faucet. Ignoring this can lead to mold or bigger repair bills later.

Credit: www.youtube.com
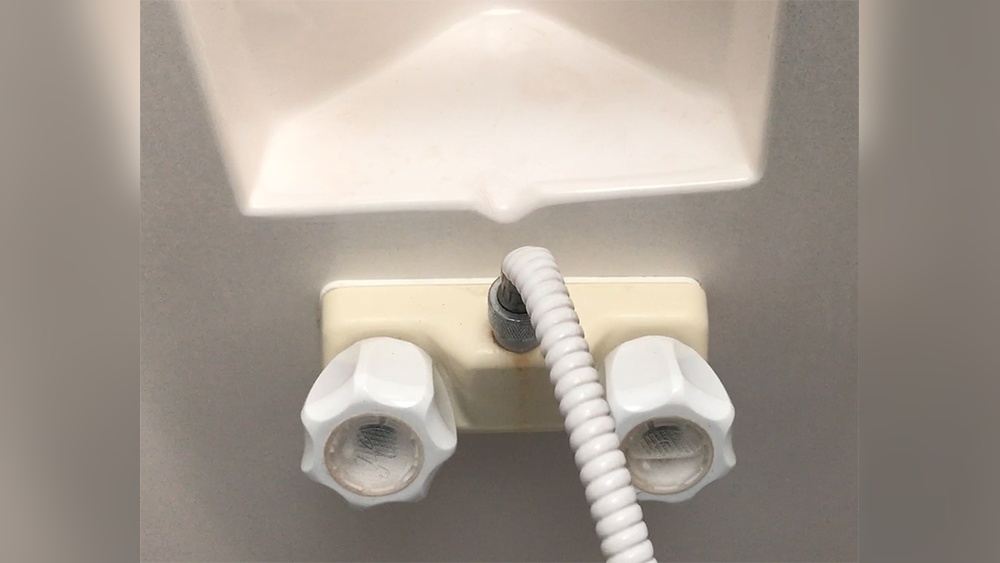
Upgrading To A Handheld Shower Faucet
Many RVers upgrade to a handheld showerhead for better control and easier cleaning. Here’s how:
- Choose a faucet that comes with a handheld sprayer and bracket.
- Install the faucet as normal.
- Attach the flexible hose to the faucet’s shower outlet.
- Mount the bracket on the wall using screws or adhesive.
- Test for leaks around the hose connection.
Handheld models make rinsing kids, pets, and even the shower itself much simpler.
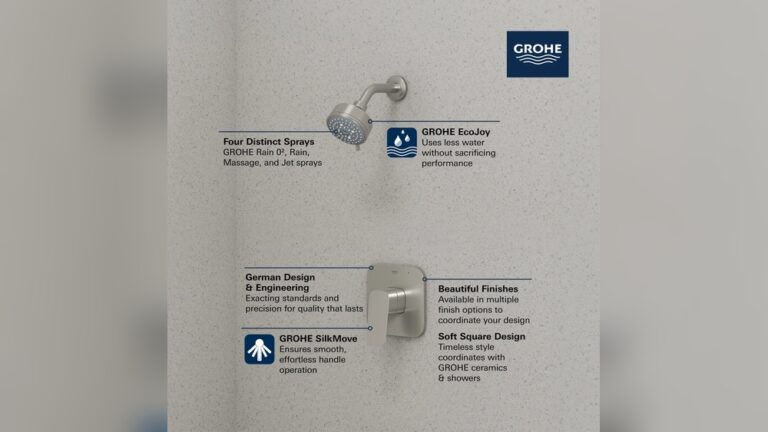
Comparing Popular Rv Shower Faucet Brands
Choosing a good brand can mean fewer problems down the road. Here’s a quick look at some popular options:
| Brand | Material | Warranty | Special Features |
|---|---|---|---|
| Dura Faucet | Plastic/Metal | 1 year | Easy install, water-saving |
| Empire Faucets | Metal | 1 year | Luxury finish, ceramic valves |
| Valterra | Plastic | 90 days | Budget-friendly |
| Oxygenics | Plastic/Metal | Limited lifetime | High-pressure showerheads |
Tip: Always check reviews and make sure replacement parts are easy to find.
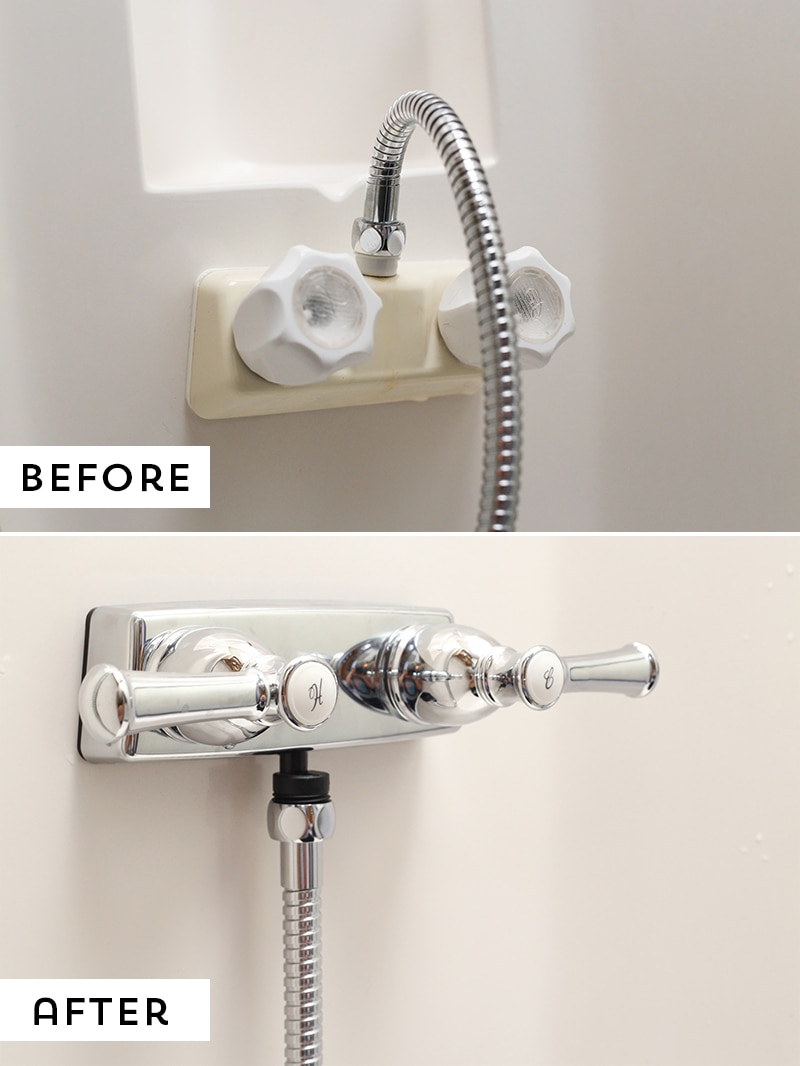
Credit: mountainmodernlife.com
Mistakes To Avoid When Replacing Your Rv Shower Faucet
It’s easy to rush or overlook small steps, but these mistakes can cause headaches:
- Forgetting to turn off the water: This can cause flooding or water damage.
- Not cleaning old sealant: New caulk won’t stick to dirty surfaces, leading to leaks.
- Cross-threading nuts: Forcing connections can strip threads and ruin fittings.
- Mixing up hot and cold lines: Label them before disconnecting.
- Using household faucets: RV plumbing often uses lighter, smaller parts. Standard home faucets may not fit or could add too much weight.
How Long Does It Take To Replace An Rv Shower Faucet?
For most people, the whole process takes about 1 to 2 hours if everything goes smoothly. If you run into old or rusted parts, it could take longer. Always give yourself extra time, especially if you’re new to RV repairs.
How Much Does It Cost?
- Basic faucet: $15–$40
- Metal or premium faucet: $40–$100+
- Tools and supplies (if you don’t already own them): $10–$30
Doing it yourself usually saves $50–$150 in labor compared to hiring a repair shop.
Environmental Benefits
Replacing a leaky or inefficient RV faucet isn’t just about comfort—it helps the environment. A dripping faucet can waste hundreds of gallons of water each year, which matters a lot when camping in dry areas or running off a water tank.
When To Call A Professional
If you find:
- Cracked or leaking pipes
- Water damage inside the walls
- Complicated plumbing layouts
…it’s smart to call a certified RV technician. Some jobs are best left to experts, especially if you’re not comfortable working with plumbing.
Final Checks And Maintenance Tips
After your new faucet is in place, take a few minutes to do these:
- Check for leaks after the first few uses.
- Reapply silicone if you see any gaps or peeling.
- Clean regularly to prevent mineral build-up, especially if you use hard water.
- Keep your old faucet as a backup, especially if you travel to remote areas.
A quick inspection every few months can help you catch problems early and avoid bigger repairs later.
Frequently Asked Questions
How Do I Know If My Rv Shower Faucet Needs Replacement?
If your faucet is leaking, corroded, difficult to turn, or has poor water pressure, it’s likely time for a replacement. Sometimes, replacing worn-out washers can help, but old or cracked faucets should be upgraded.
Can I Use A Regular Home Shower Faucet In My Rv?
Most home faucets are too heavy or use different pipe spacing than RVs. RV faucets are designed to fit lighter, thinner walls and connect to flexible hoses or PEX pipes. Always check compatibility before buying.
What If My New Rv Faucet Still Leaks?
Double-check all connections. Make sure you’ve used plumber’s tape on threaded joints and that all nuts are tight but not overtightened. If it still leaks, inspect for damaged pipes or faulty faucet parts.
How Often Should I Replace My Rv Shower Faucet?
With normal use, a quality RV faucet should last 5 to 10 years. Replace sooner if you see leaks, cracks, or signs of mold.
Where Can I Find More Information About Rv Plumbing Repairs?
You can find helpful guides and community advice on sites like RV Repair Club.
Replacing your RV shower faucet doesn’t have to be stressful. With careful planning and the right tools, you can upgrade your bathroom and enjoy better showers on all your adventures. Take your time, follow these steps, and soon you’ll have a leak-free, modern faucet that makes life on the road more comfortable.